Today’s Technical Tuesday post highlights the Acumatica portal. Learn how Acumatica cloud ERP users can edit the portal home page by creating a new home page that can be edited using HTML or simple wiki markup language.

For Acumatica cloud ERP users, the Acumatica portal is an easy way to automate transactions with business partners. The portal supports online ordering, order status, support cases, account updates, document review, and custom screens so you can reduce costs and improve the efficiency of customer interactions.
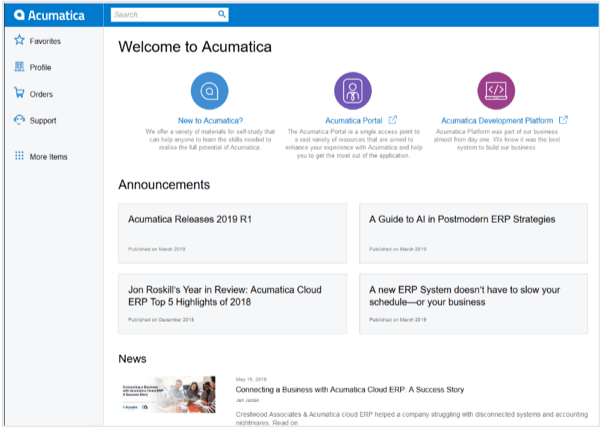
The Acumatica portal includes document management features so that you can update portal content using a friendly wiki format or by using HTML.
In this paper we describe how you can change the default home page to reflect your brand and include additional customer facing content.
You can use the folllowing to edit the home page:
- Wiki markup language
- Standard HTML
Setting up the home page is simple but requires a resource with wiki or html skills. After the page has been created, there are often ongoing updates, such as posting news, sales promotions, and announcements for your customers.
Modifying the existing home page
We will follow the process below to create a new home page for our portal.
- Create a new wiki
- Add an article to the wiki we just created
- Set the portal home page to be the new wiki
Step 1: Create a new wiki
Navigate to the wiki screen (SM.20.20.05) and click the plus sign to create a new wiki.

I created a new wiki called PortalPages. I added it to the site map in the Documentation location in the classic UI as shown above.
Step 2: Add an article to the new wiki that you created in step 1
In order to perform this step, you need to switch to the Classic UI. To switch to the classic UI:
- Click your user ID in the upper right of the screen
- Select My Profile
- Click the User Info tab
- Check the Show Classic UI by Default screen

Logout of the system and log back in to activate the classic UI.
From the Classic UI you can:
- Access the Documentation Menu where you added your wiki
- Click the Create New Article option in the left menu
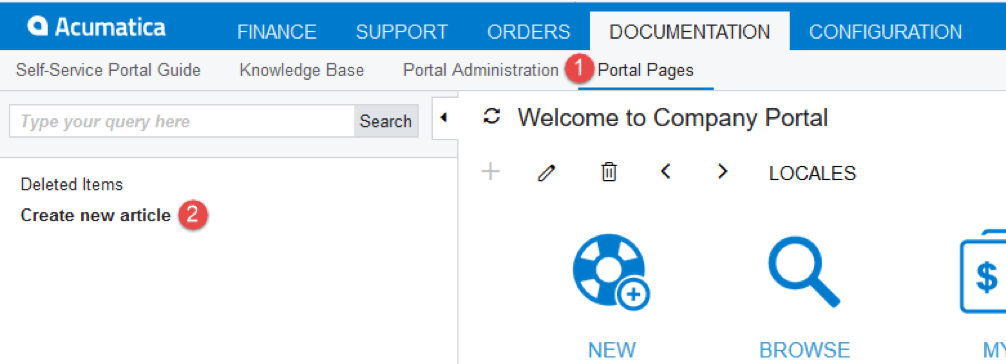
I started by creating a very simple article as illustrated below.

Set the access rights of your new screen so that portal users can see it. If you do not do this, then users will see the old portal home screen.
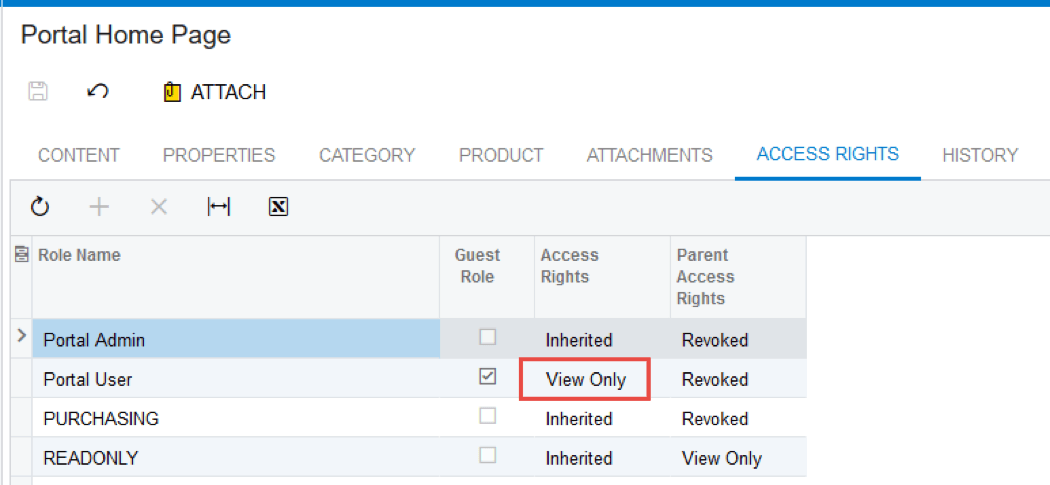
Step 3: Set the new screen to be the portal home page
Navigate to the Portal Preferences screen (SP.80.00.00). On that screen you can select the new wiki article that you created to be your new home page. If the home page area is left blank or refers to an article that doesn’t exist, then Acumatica displays the default welcome page with the “Welcome to Acumatica” article.
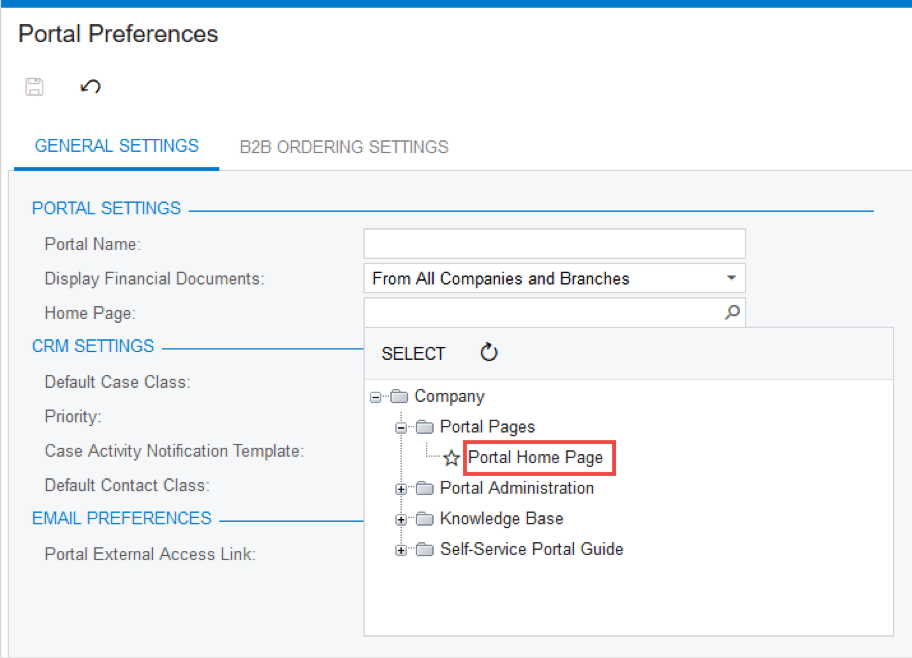
Now, when users login they will see your new home page. In the appendix, we show some ideas for making your home page more exciting.

Customizing your portal home page
Acumatica’s portal is a powerful tool for providing 24/7 ordering, account review, case management, and more to your customers.
Acumatica’s wiki allows you to tailor the Home Page experience so that you can customize your user’s experience by:
- Including links to other portal pages
- Inserting graphics and pictures
- Link to articles, post news, notify users of sales promotions, and more
Updating the portal page requires knowledge of HTML or the Acumatica wiki markup language. Inexpensive HTML resources are easy to find on various websites.
If you have any questions about modifying and customizing your Acumatica portal home page, contact our team today. Also, check out our Technical Tuesday series for more step-by-step tutorials on using Acumatica’s cloud ERP software, such as managing timecard accounting for projects and multi-factor authentication via single sign-on.
APPENDIX 1: Modifying the Wiki Page with HTML
You can modify the page that you created using HTML. The borders can be modified by modifying the CSS file that drives the wiki.

Example 1: Adding HTML
The default Wiki article that is the home page in SalesDemo belongs to a Wiki that the admin does not have rights to change.
After manually changing the WikiID field in the database, I was able to edit the article.
The code for the page shown on the right is provided below.
<!DOCTYPE html>
<html>
<body>
<div class=”main”>
<div class=”links”>
<div class=”links-line”>
<ul>
<li class=”nc”><a href=”../Pages/SP/SP203000.aspx”><span>NEW<br>CASE</span></a></li>
<li class=”vc”><a href=”../Pages/SP/SP204000.aspx”><span>BROWSE<br>OPEN CASES</span></a></li>
<li class=”md”><a href=”../Pages/SP/SP402000.aspx”><span>MY<br>DOCUMENTS</span></a></li>
<li class=”ms”><a href=”../Pages/SP/SP404600.aspx”><span>MY<br>STATEMENTS</span></a></li>
</ul>
</div>
<div class=”links-line”>
<ul>
<li class=”sh”><a href=”../Pages/SP/SP700000.aspx”><span>BROWSE<br>CATALOG</span></a></li>
<li class=”mo”><a href=”../Pages/SP/SP700003.aspx”><span>MY<br> ORDERS</span></a></li>
<li class=”kb”><a href=”../Wiki/Show.aspx?pageID=7e6ec451-8ceb-4ba0-9f01-4483d29e1d94″><span>KNOWLEDGE<br>BASE</span></a></li>
<li class=”ep”><a href=”../Pages/SP/SP408030.aspx”><span>EDIT<br>COMPANY INFO</span></a></li>
</ul>
</div>
</div>
<table class=”table”>
<tr>
<td class=”new-cont”>
<h2>Welcome to the Customer Portal!</h2>
<span><p>The Customer Portal is a single solution that you use to more efficiently cooperate and communicate with us. </p>
<p>By using the Customer Portal, you can do the following: </p>
<ul>
<li>Get an instant view of financial information, such as contracts, documents and payments received, while tracking due dates and amounts due </li>
<li>Submit new support cases and communicate with the support team on existing cases </li>
<li>Search through the knowledge base and provide feedback </li>
<li>View the product catalog and place orders online </li>
</ul>
</span>
</td>
</tr>
</table>
</div>
</body>
<style>
a:hover{text-decoration:none}
html{margin:0;padding:0}
body{font-family:Helvetica,Tahoma,sans-serif;width:100%;height:100%;overflow-x:hidden}
.main{margin-left:20px}
.links{width:100%;margin-left:-20px}
.links .links-line{height:150px}
.links .links-line ul{list-style:none}
.links .links-line ul li{float:left}
.links .links-line ul li a{position:relative;float:left;width:150px;height:150px;color:#329bd4;background-repeat:no-repeat;background-position:50% 20%;background-size:50% 50%;font:16px Helvetica}
.links .links-line ul li a span{position:absolute;display:block;bottom:10px;text-align:center;width:150px}
.links .links-line .nc a{background-image:url(../Wiki/image/portal-newcase.png)}
.links .links-line .vc a{background-image:url(../Wiki/image/portal-viewcases.png)}
.links .links-line .md a{background-image:url(../Wiki/image/portal-mydocs.png)}
.links .links-line .ms a{background-image:url(../Wiki/image/portal-statements.png)}
.links .links-line .sh a{background-image:url(../Wiki/image/portal-shop.png)}
.links .links-line .mo a{background-image:url(../Wiki/image/portal-myorders.png)}
.links .links-line .kb a{background-image:url(../Wiki/image/portal-kb.png)}
.links .links-line .ep a{background-image:url(../Wiki/image/portal-edit.png)}
.table{width:85%;padding-top:10px}
.table tr td{padding-top:10px;padding-bottom:10px}
.new-cont h2{line-height:22px;margin-bottom:15px}
.new-cont span{line-height:22px}
.new-cont .time{color:#999;font:14px Helvetica;line-height:0}
</style>
</html>
Users with knowledge of HTML programming can easily modify this page to create their own look and feel.
Example 2: Updating CSS
If you want to modify the borders of the portal, then you need to modify the CSS stylesheet that is associated with the portal.
You can do this by going to the Wiki Style Sheets screen (SM.20.20.30) and selecting WikiWebSite in the Style Name field.
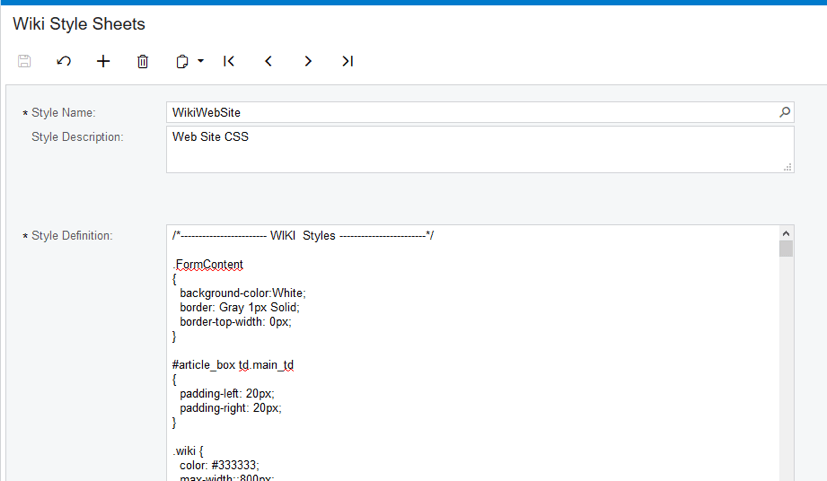
Within the style sheet, you can make any updates you want to modify the site.
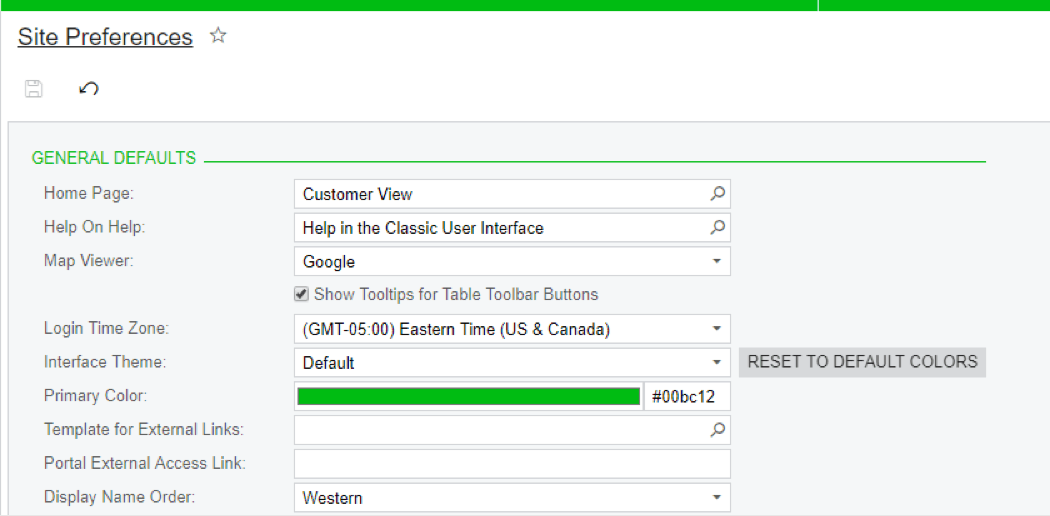
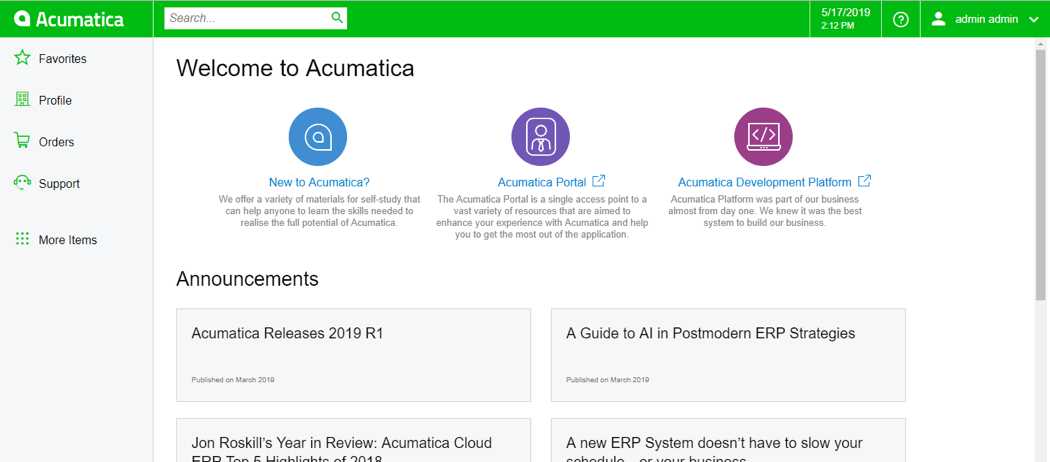
In Acumatica 2019 R1, we provide an easy way to modify the main color associated with your site. Go to the site preferences screen in your main application (not the portal) and change the standard #007acc to a different color … such as ##00bc12 to get the result below.
Read More from the Technical Tuesday Series
 Canada (English)
 Colombia
 Caribbean and Puerto Rico
 Ecuador
 India
India
 Indonesia
 Ireland
 Malaysia
 Mexico
 Panama
 Peru
Peru
 Philippines
 Singapore
 South Africa
 Sri Lanka
 Thailand
 United Kingdom
 United States


