 Canada (English)
 Colombia
 Caribbean and Puerto Rico
 Ecuador
 India
India
 Indonesia
 Ireland
 Malaysia
 Mexico
 Panama
 Peru
Peru
 Philippines
 Singapore
 South Africa
 Sri Lanka
 Thailand
 United Kingdom
 United States
 AcumatiCares
Reviewed: Dec, 2023
Introduction
This is a follow up on the video that I shared last week on mitigating the issue of running out of API calls using notifications and SignalR. In this blog post, I provide greater detail, along with the code that you can use in your implementation of the information that I presented.
Receiving Acumatica Push Notifications
In the following steps, I will show you directly how you can receive push notifications from Acumatica into a Windows Forms application.
Using the Acumatica Sales Demo data, make the following simple configuration changes. Open the web.config file and search for the appSettings section and set the EnablePushNotifications key to true.
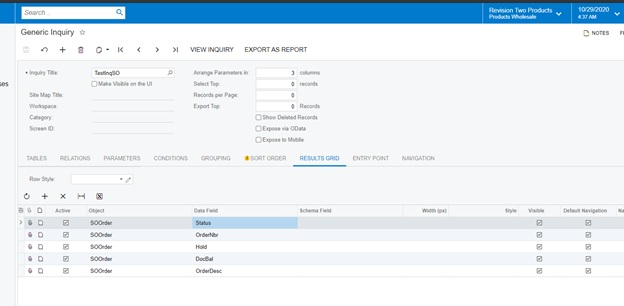
Next, create a Generic Inquiry which provide changes you need to track. Let us name it “TestInqSO”. Then we would add a SOOrder table and fields to a grid – such as Status, OrderNbr, Hold, DocBal, OrderDesc, and so on.
Next, we would then define multiple queries for each notification destination. However, the data queries should adhere to the following recommendations for optimal results:
- Do not use aggregation and grouping in any of the queries; Acumatica ERP does not guarantee that push notifications will work correctly using these parameters.
- Do not use joins of multiple detail tables in your queries because this may cause the system to hang.
- If you need to join multiple tables, use a left join or an inner join in your data queries. If you use an inner join, the query execution may be slower than for a left join.
- Use as simple a data query as possible.
- For a query defined by using a generic inquiry, do not use a formula on the Results Grid tab of the Generic Inquiry
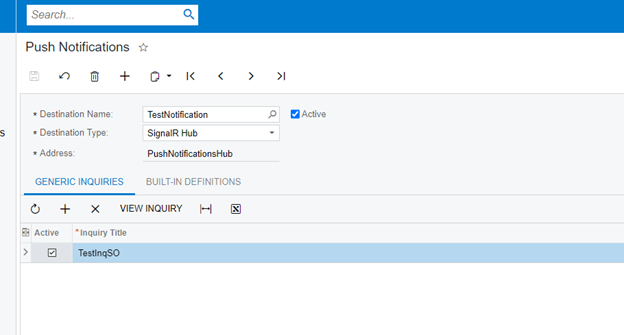
Now, go to the Push Notifications (SM302000) and create a new one.
In the Destination Name, type TestNotification for example.
Check the Active check box.
In the Destination Type, choose SignalR Hub.
In the Generic Inquiries tab add a new row, Inquiry Title and select the TestInqSO GI you created previously and check Active and save your changes.
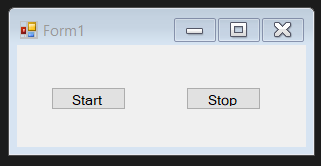
At this time, you will want to create a simple Windows Forms application with two buttons: Start and Stop to start and close the connection. Then, create Click event handlers for each of the buttons.
Next, define the class for your notification, as shown in the following code.
Provide the next steps in the start click event handler:
Set up a Basic authentication token to authenticate the application in Acumatica ERP as shown in the following code.
Connect to an instance of Acumatica ERP as follows:
If you do not use Tenants, you can authenticate in the following manner:
var basicAuthToken = Convert.ToBase64String(Encoding.UTF8.GetBytes(login + “:” + password));
Then you will create a proxy to the SignalR hub based on the name of the hub that was specified in the Destination Name box when the push notification was defined on the Push Notification (SM302000) form.
Process Notifications
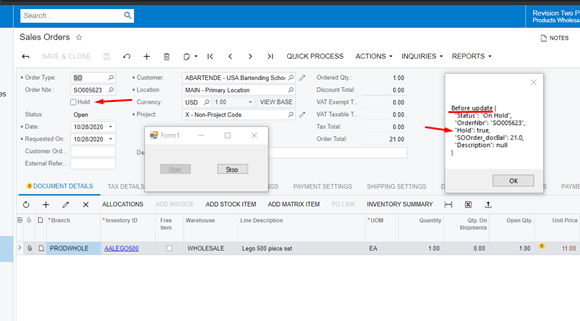
The following code displays a MessageBox with JSON data. Structure JSON forming by the created GI TestInqSO tab Result Grid.
When data is created on the Acumatica instance, you will receive these changes in NotificationResult.Inserted.
When data is deleted on the instance, you will receive these changes in NotificationResult.Deleted.
When data is updated on instance, you will receive these changes in NotificationResult.Deleted (data before an update) and in NotificationResult.Inserted (data after an update).
In the Stop click event handler, just close close connection:
connection.Stop();
Now, each time there are any changes made in Sales Orders (SO301000), you will receive notifications.
The full code to accomplish all of this looks like this:
Summary
With the workflow described in this article, you can easily notify 3rd party services and applications about changes which happen inside of Acumatica. Also with Acumatica’s push notifications mechanism, you can get real time communication between Acumatica and other services instead of regularly calling Acumatica APIs, pushing the API call restrictions and exhausting these, impacting your application connection limits.
Happy Coding!