Reviewed: Apr, 2023
Introduction
This is a follow-up article to the blog post restore large snapshots which describes how you may restore a larger than gigabyte data set to a new instance.
Though useful; we have found that all of our clients have at least one user-defined field that needs to be migrated over to the new instance to do so please follow the steps below.
Preparing data
- Create a snapshot of the data you would like to import into the new instance, it is recommended to use the XML format.
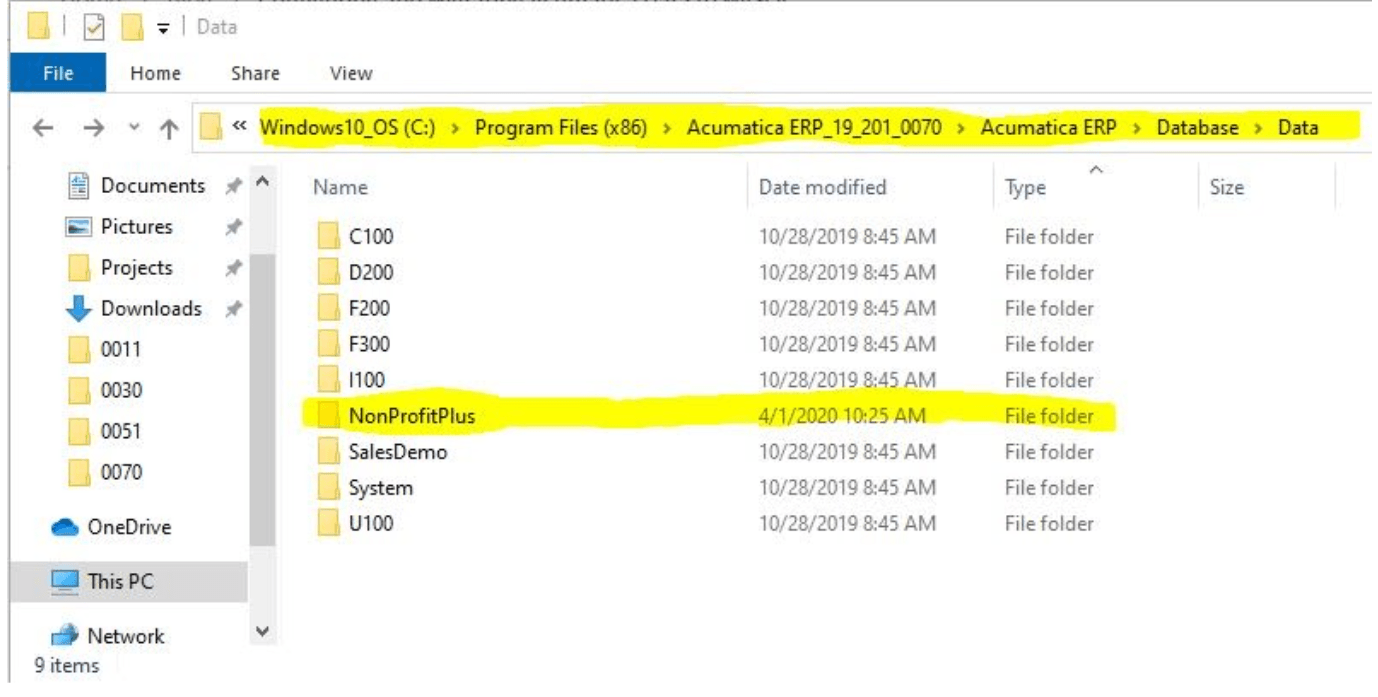
- Navigate to the “Database/Data” folder within the Acumatica wizard install.
Ex : C:\Program Files (x86)\Acumatica ERP_19_201_0070\Acumatica ERP\Database\Data - Create a folder to hold snapshot data.
Ex : NonProfitPlus
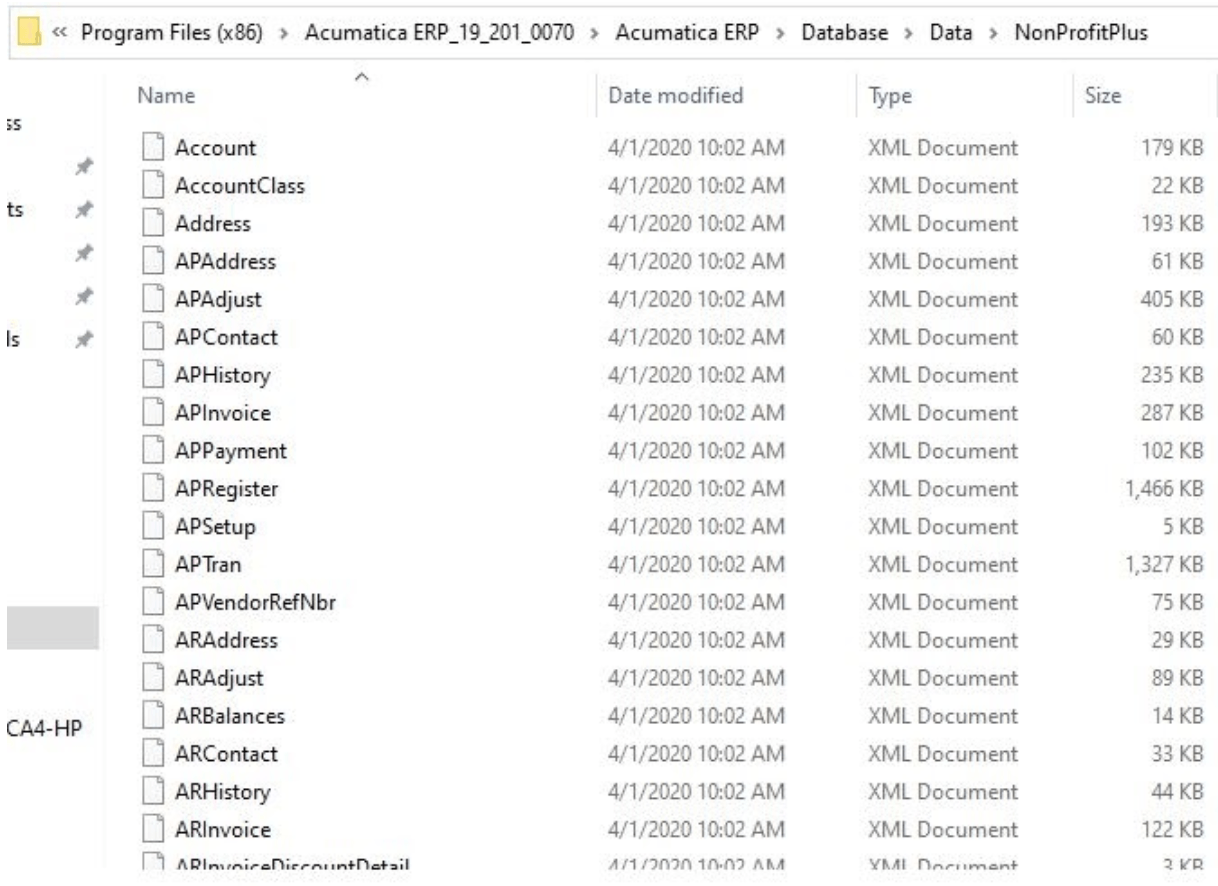
- Extract all snapshot files into the created folder.

- Delete Manifest.xml file from created folder after extraction.
Modifying Wizard
To allow the insertion of data from custom columns and tables contained within your snapshot you will be required to modify the ERPDatabaseSetup.ADC file within the Acumatica wizard. Files of note and their function are listed below.
- ERPDatabaseSetup.ADC – Defines installation process and references
- database_schema – Defines tables and fields to be created on install
- database_afterschema – Defines data “clean-up” after table and field creation and data insertion
- database_update – Defines data update from previous versions of table and field schema
- database_procs_mssql – Defines creation of FUNCTION, VIEW, PROCEDURE for mssql
- databse_procs_mysql – Defines creation of FUNCTION, VIEW, PROCEDURE for mysql
- Navigate to the “Database” folder within the Acumatica wizard install.
Ex : C:\Program Files (x86)\Acumatica ERP_19_201_0070\Acumatica ERP\Database - Open the ERPDatabseSetup.ADC file and modify by adding the following line:GIST: https://gist.github.com/jvanhoesen/1ce49027a4bd62e8127982254bf1b14d
- Create the XML file database_schema_custom.xml within the “Database” folder, its generic schema is as follows:
GIST: https://gist.github.com/jvanhoesen/15bff372f40aa7e2d68373761d8649a6
The easiest way to construct this file is to open the project.xml file from the customization projects that have been loaded on the snapshot instance and find the section where the custom tables are defined. Remove the extra syntax and insert it into your newly created database_schema_custom.xml file.
Ex:
GIST: https://gist.github.com/jvanhoesen/df6066f1662c933168d26f7b517efef1
Becomes:
GIST: https://gist.github.com/jvanhoesen/15bff372f40aa7e2d68373761d8649a6
Creating Instance
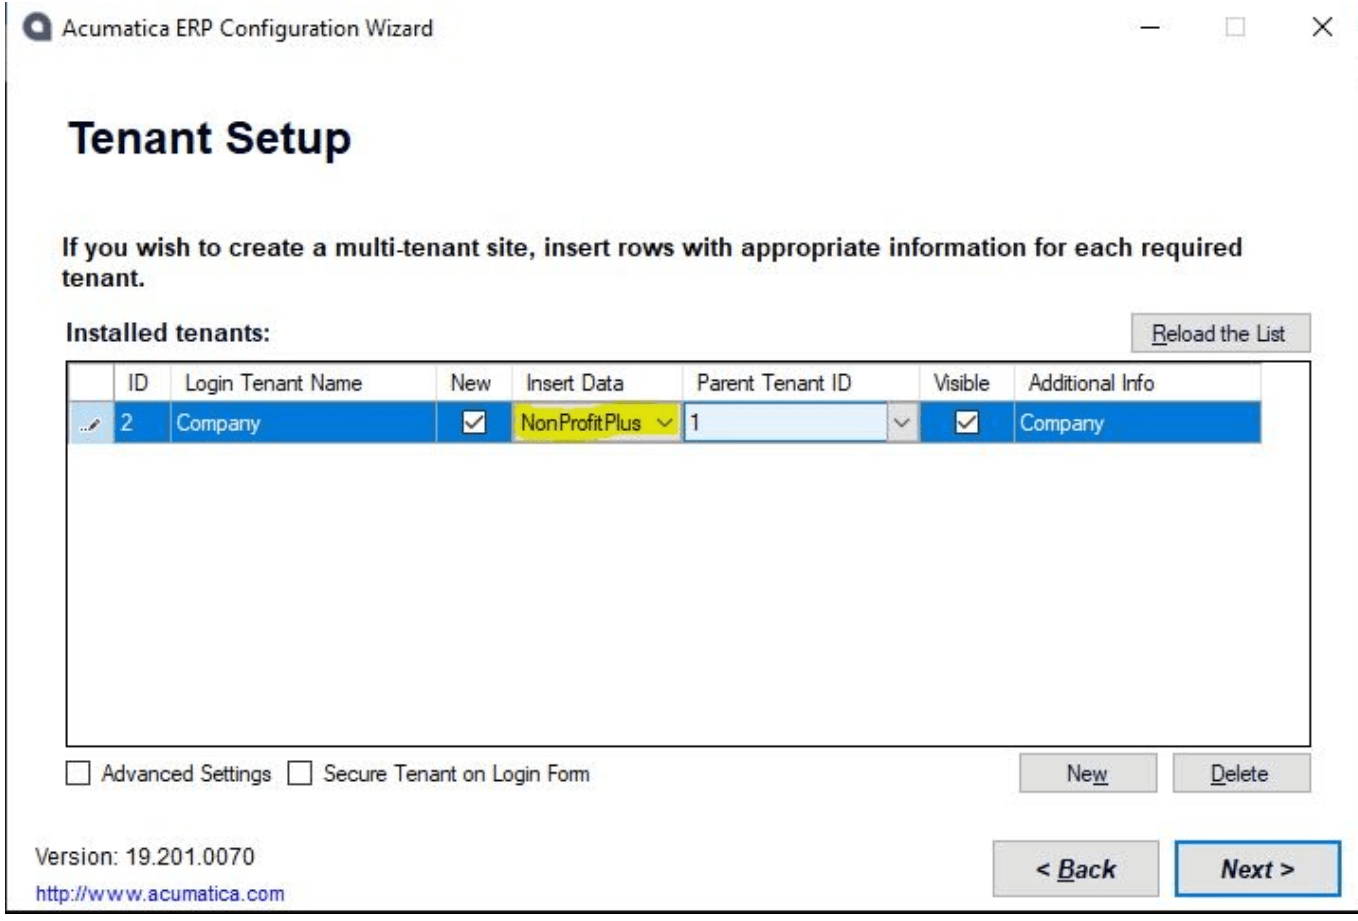
- Open Acumatica wizard and follow the normal steps to the instance creation
- On the Tenant Setup step, you will see your custom data now available

- After installation, upload and publish the customization packages from the originating instance.
Conclusion
Though Acumatica by default limits the size of snapshot restoration to 1GB this can be overcome. Modifying the Acumatica ERP Configuration wizard allows the creation of a new instance from the defined snapshot, including fields and tables from customization projects published during the snapshot creation.
Happy Coding!
 Canada (English)
 Colombia
 Caribbean and Puerto Rico
 Ecuador
 India
India
 Indonesia
 Ireland
 Malaysia
 Mexico
 Panama
 Peru
Peru
 Philippines
 Singapore
 South Africa
 Sri Lanka
 Thailand
 United Kingdom
 United States


