
Reviewed: Nov, 2023
As a developer that deals with multiple clients using various versions of Acumatica, a challenge arises to manage them in a single development environment. In older ERP implementations, this required a large set of Virtual Machines or a Windows Hyper-V platform where you clone or build operating systems to create individual virtual environments for each client. As your client list grows and upgrades occur, this becomes unmanageable and unsustainable over time. With the advancements in cloud computing, we can potentially leverage AWS or Azure as well, but this can also grow to unsustainable sizes.
With Acumatica being built from the ground up using the .NET Framework and installations deployed in an isolated environment, we can have multiple instances on a host development machine without the need for virtual environments. Each instance of Acumatica uses one SQL database and you can have multiple instances on a single machine regardless of the version. Let’s see how this can be accomplished.
Before we start installing the software, please review the latest System Requirements for Acumatica:
https://help-2021r2.acumatica.com/Help?ScreenId=ShowWiki&pageid=a8d5d39d-513a-4f93-b484-a95eb33103a1
Note, if you don’t have SQL Server on your machine, please get a copy of SQL Server Developer Edition here:
https://www.microsoft.com/en-ca/sql-server/sql-server-downloads
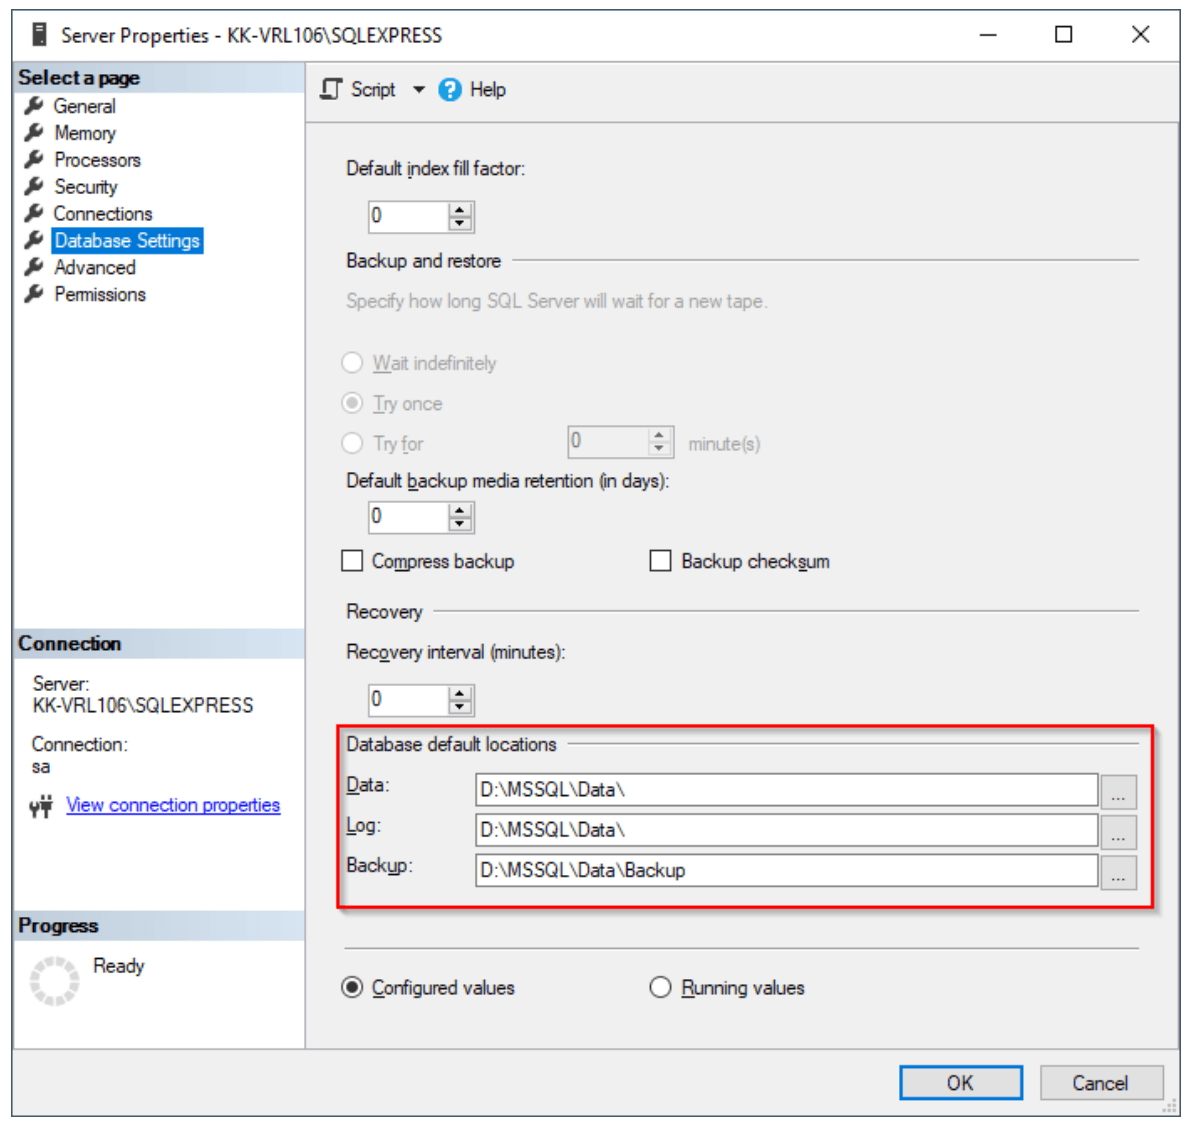
One rule of thumb I use as we set up our environment, is that I keep databases and Acumatica instances on a drive separate from the operating system. First step is to change the default location where the databases are created. In my case, I moved them to the D Drive:
- Right Click on Server and Select Properties.
- In the Server Properties dialog box, navigate to the Database Settings tab. Then under Database default locations group, change the location to point to the alternative drive.
- Click on OK to apply changes.
When downloading the build from http://builds.acumatica.com, I copy the installer to a default location like D:\AcumaticaInstallers. I also create a default location where the installer will install the Acumatica file such as D:\Acumatica ERP.
In the training course S100 System Installation and Maintenance 2021 R1, you will find the settings required for IIS. Section 1.4 details the windows features required to be turned on.
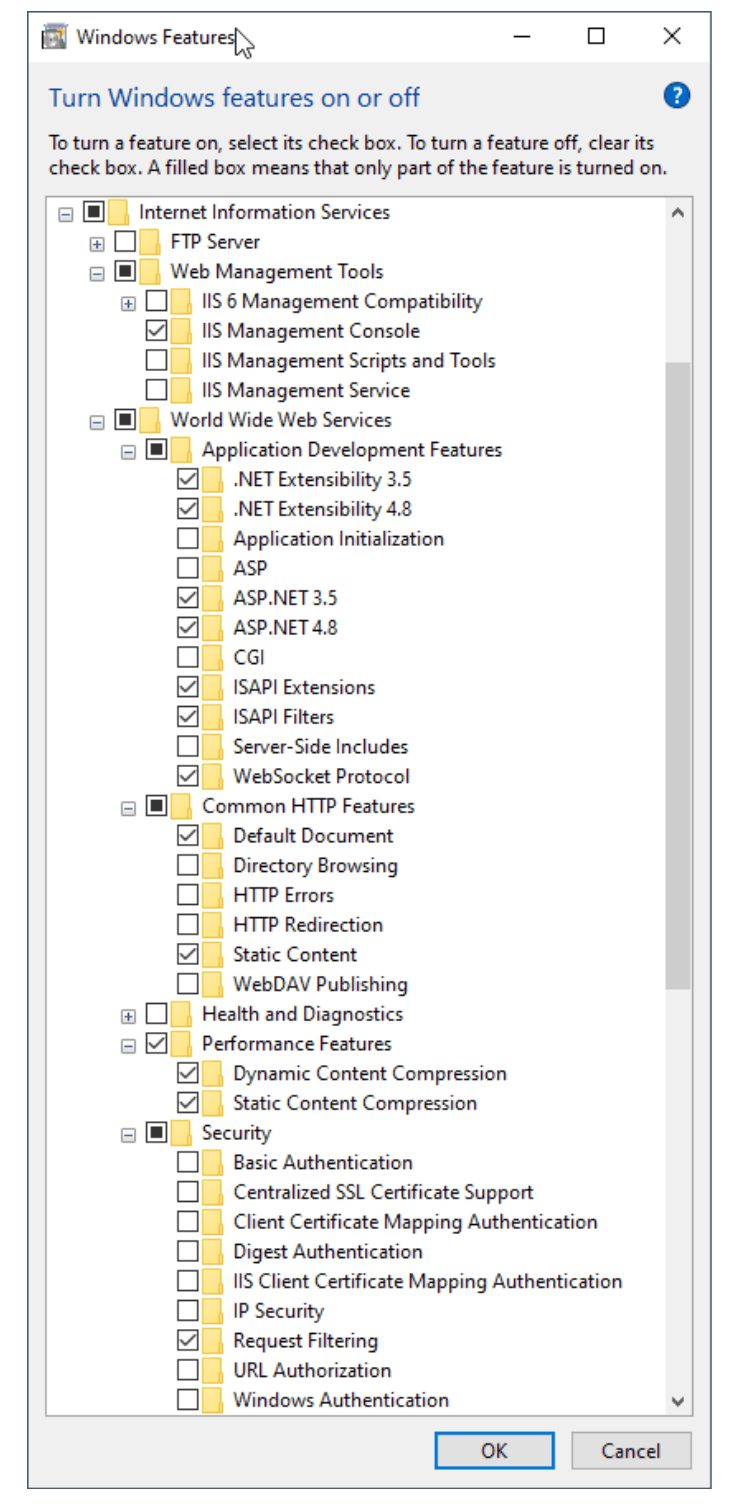
From there, we can use the following handy command (run command prompt as Administrator) to do a silent install of Acumatica:
msiexec /a “D:\AcumaticaInstallers\AcumaticaERPInstall 21.202.0054.msi” /qb targetdir=”D:\Acumatica ERP\Acumatica ERP 2021 R2 21.202.0054″
The /a switch specifies administrative installation. The /qb switch invokes a quiet install with a basic interface. We need to specify the targetdir to be a location with the Acumatica version. The installation of Acumatica is all self-contained which means that there are no outside dependencies to be concerned about.
You can potentially use a Command Line tool to install Acumatica instance:
https://help-2021r2.acumatica.com/Help?ScreenId=ShowWiki&pageid=b4770bd0-deda-403a-aeb6-e3ddbbbfabb1
At this point in time, you have a single instance of Acumatica ERP Configuration Wizard installed on your machine an isolated folder under D:\Acumatica ERP.
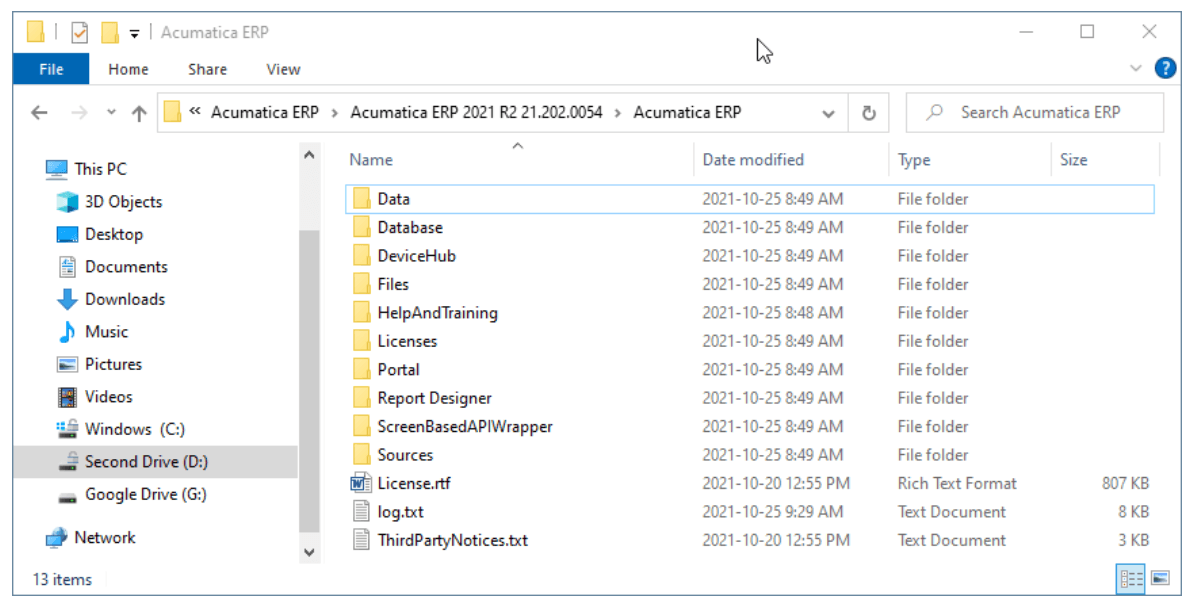
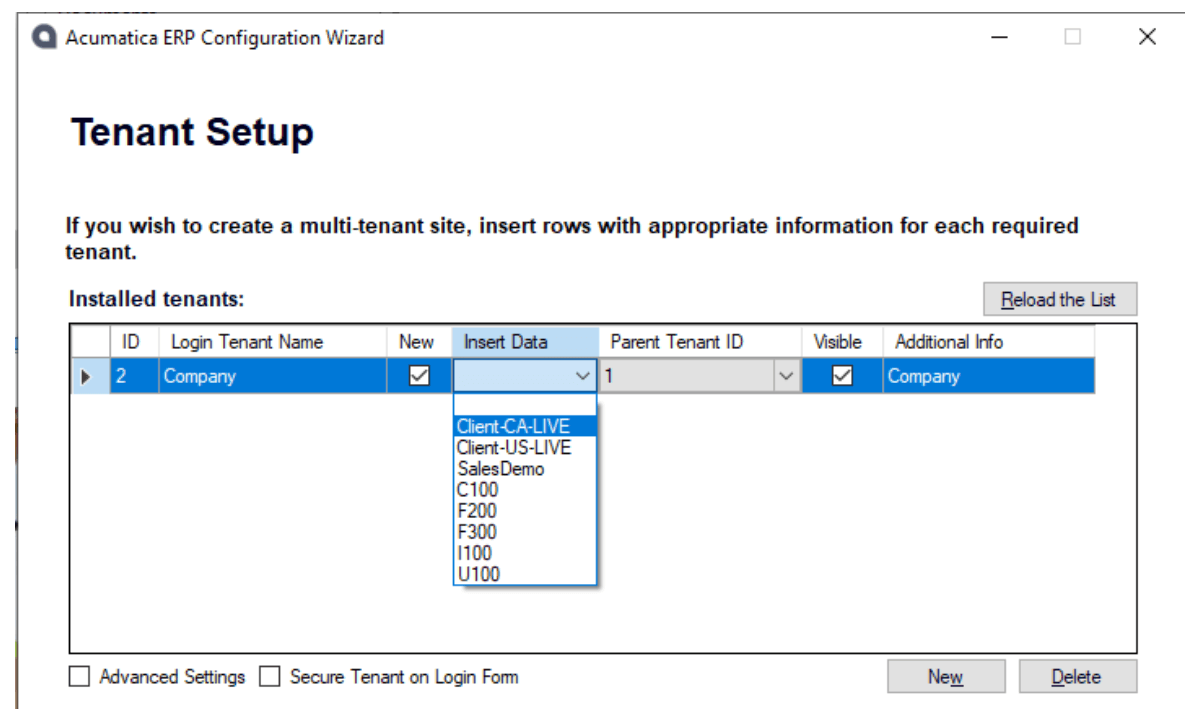
A few more points to highlight when installing a single instance of Acumatica from the Configuration Wizard. To install a client’s environment quickly, I typically grab a snapshot of their system. I unzip the snapshot and place it in the \Acumatica ERP\Database\Data folder.
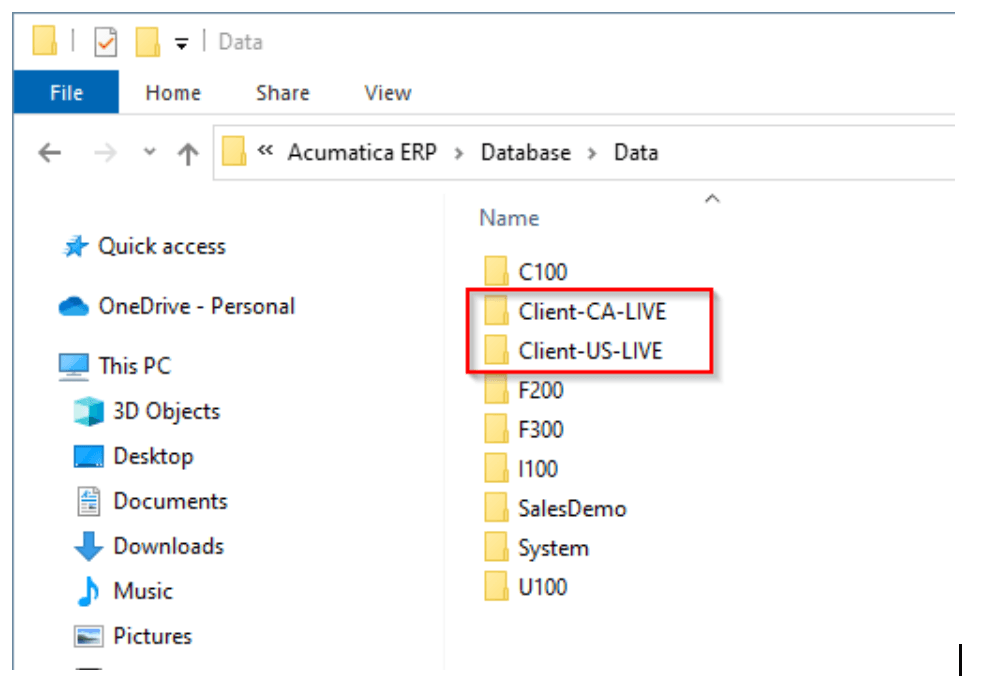
The snapshot can be seen here during the Configuration Wizard installation which will give you a fresh install of the client’s Acumatica instance with the latest data from the snapshot in one spot.
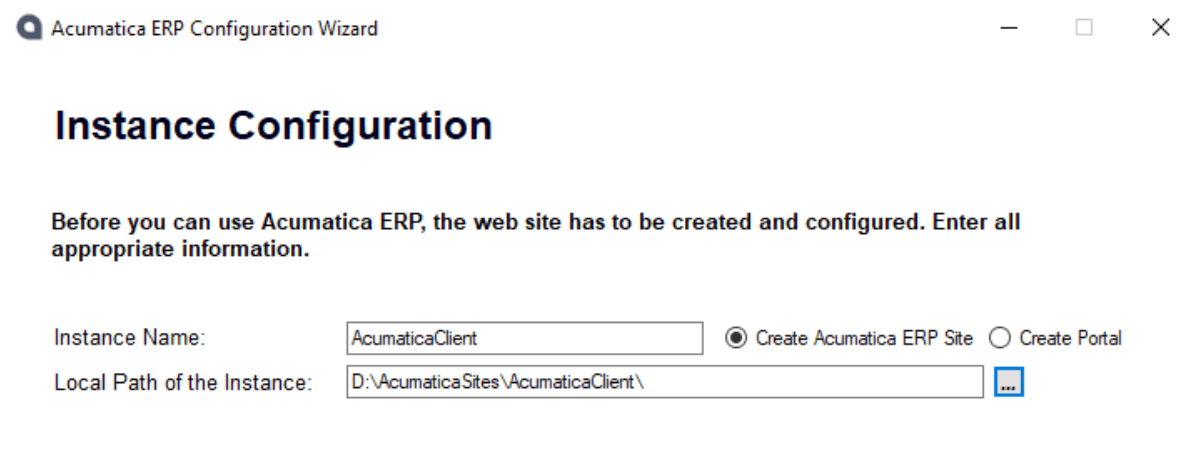
Be sure to explicitly specify the location of the installation to point to the AcumiticaSites subfolder as shown below:
When finalizing the installation, I create a new AppPool for each instance of Acumatica.
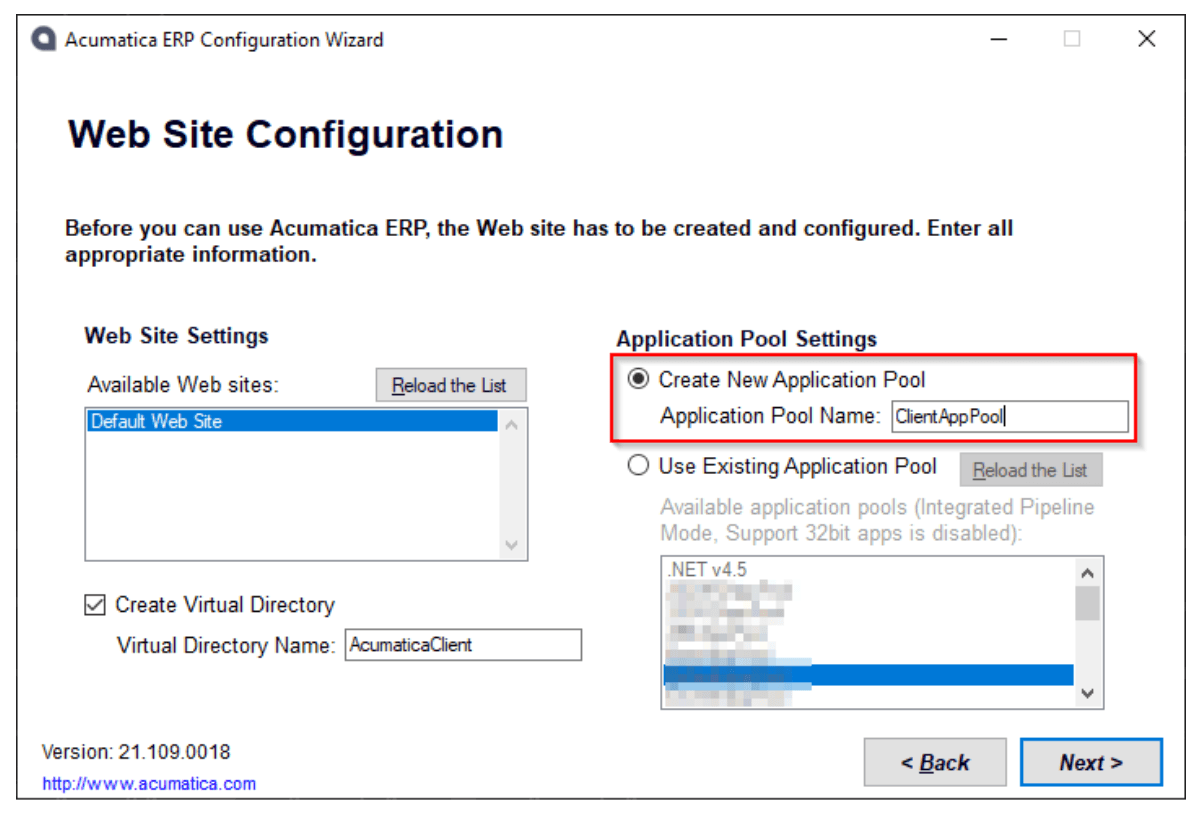
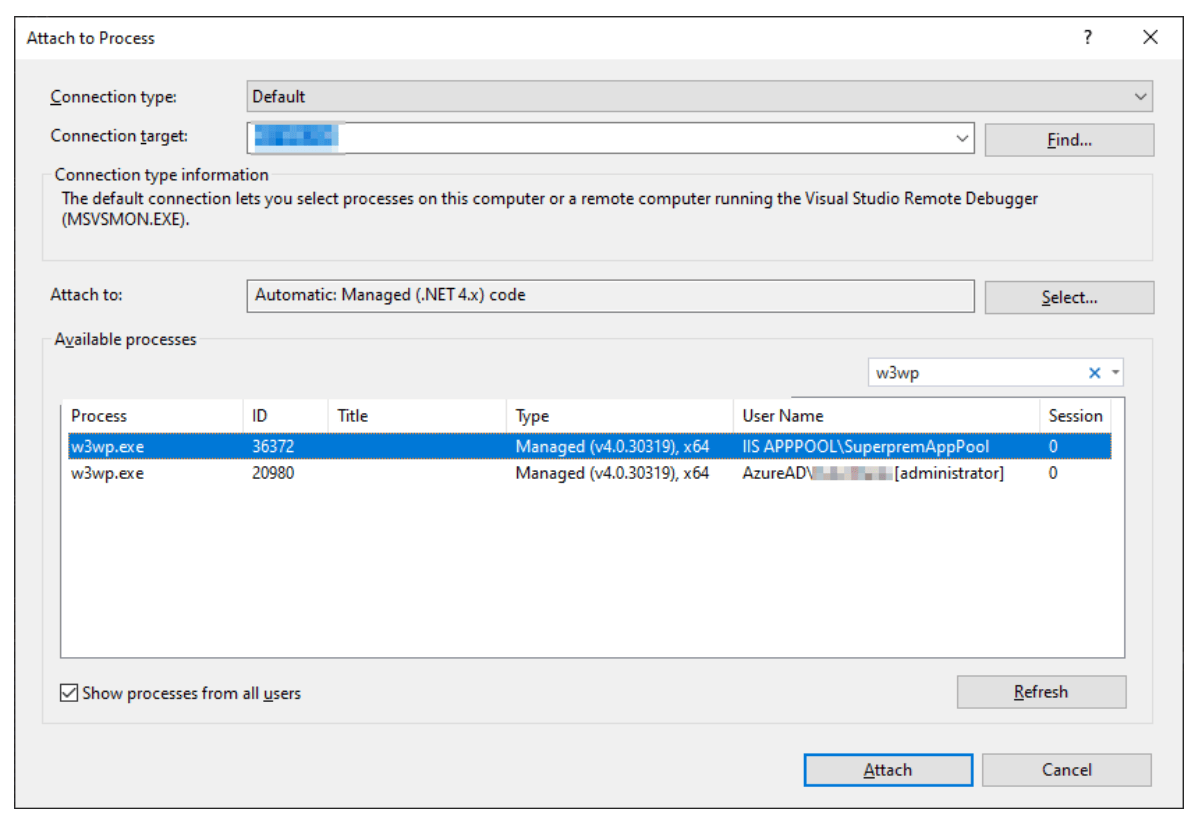
This allows you to restart the AppPool specific to the instance of Acumatica. Also it allows you to find the exact AppPool that is required when debugging your customization packages:
Once the Acumatica instance has been created, you will need to upload any customization packages that were part of the snapshot.
In conclusion, building instances of Acumatica locally help with troubleshooting client issues, testing integrations via REST API and customizations. As partners of Acumatica, we have several clients on different instances of the product and we need to ensure quality control throughout the process.
I hope this post will help you with installing and manage multiple instances of Acumatica, thus making your developer life just a little bit better. For additional tips, please review Acumatica’s Onboarding New Acumatica Developers page.
Happy Coding!
 Canada (English)
 Colombia
 Caribbean and Puerto Rico
 Ecuador
 India
India
 Indonesia
 Ireland
 Malaysia
 Mexico
 Panama
 Peru
Peru
 Philippines
 Singapore
 South Africa
 Sri Lanka
 Thailand
 United Kingdom
 United States


