Introduction
If you have been using Acumatica for a while, or are about to start using the best ERP in the market, it is certain that you have encountered – or soon will – Acumatica’s customization packages.
The customization packages are an essential part of the system and its extensibility. It is the tool that allows us ISVs, VARs, and End-users to tweak various functionality or completely re-define it.
Most of this information is very well documented in the development guides offered by Acumatica. In this article, however, we will be looking into the effects of publishing a customization package and identifying what happens within the instance’s directory and its database. Let’s go ahead and peek under the hood!
What is available within a customization package?
A customization package is comprised of multiple nodes/areas associated to different features in the system: code development, pages customization, endpoint extension/creation, etc.
In this article we are going to be looking into the effects of two of these nodes. I will be focusing on those that are most often used on a day-to-day basis in my work.
Keep in mind that the analysis of the results that will be shown next can be easily reviewed/tested in an environment in which access to the instance’s installation directory is possible. If you are working on a SaaS instance, it is convenient to try this on a local environment first.
CODE Node
It is well documented that this feature can be used to extend out-of-the-box Acumatica functionality. It can also be used for development of new features– i.e., new graphs, new DACs, or even just general C# coding.
For this example, we will go ahead and create a new Action/Button in the Bills and Adjustments page (AP301000):
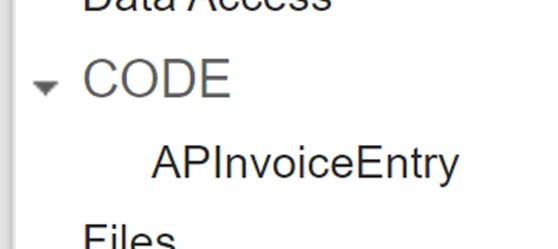
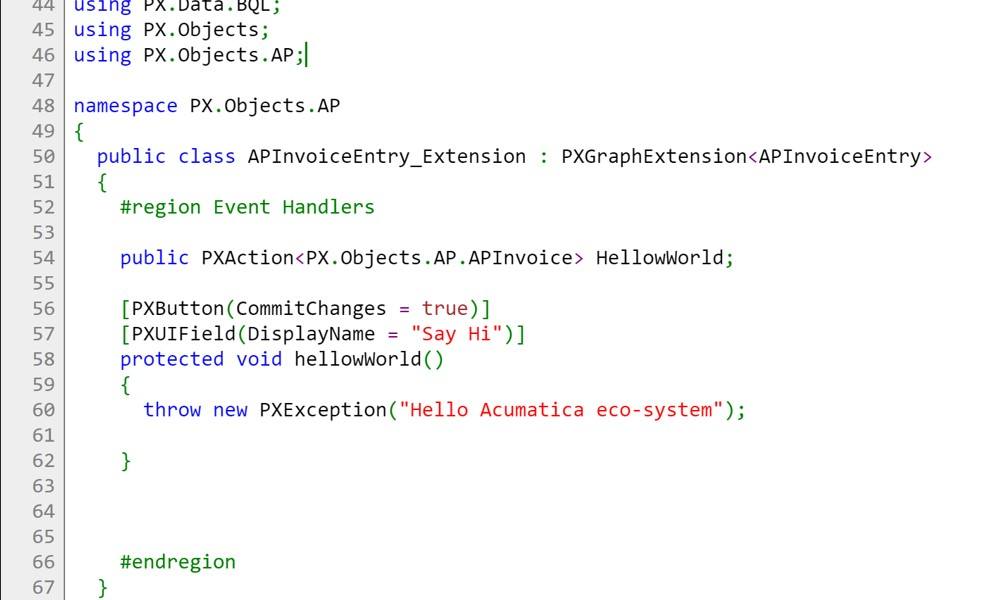
We then publish it and obtain the expected functionality:
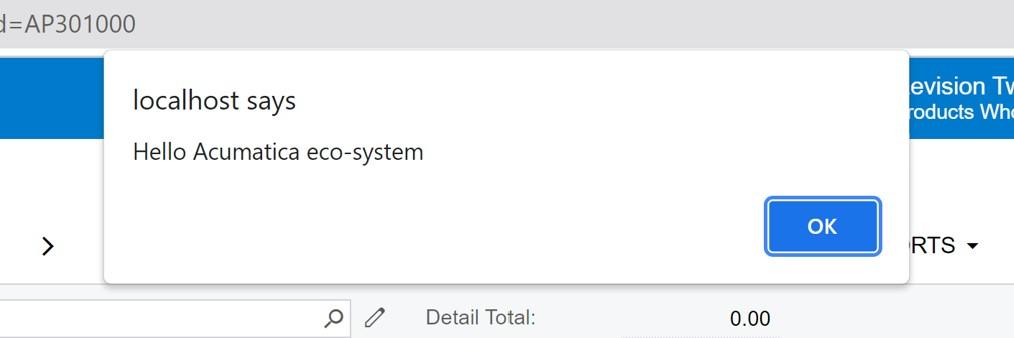
Now, let’s see what actually happened under the hood:
If we go to the directory [Instance]\App_RuntimeCode we will find a .CS file with the name of the node and the logic that was just published.
It is the content of this folder – the one that is used by Acumatica to identify any extensibility – that has been applied to the system[1]

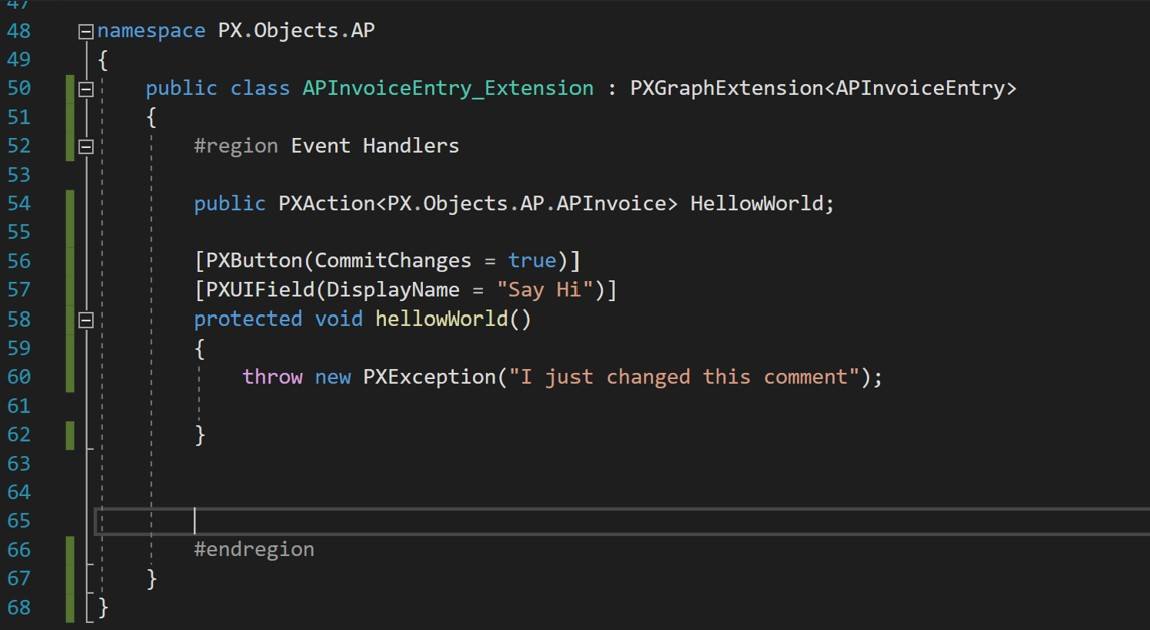
What is really interesting about this, is that we can actually open the file (or create a new one) and make any adjustments to it directly from our IDE – working on a more code-friendly interface. If we open the instance and the file from Visual Studio – for instance – we will get the actual file content.
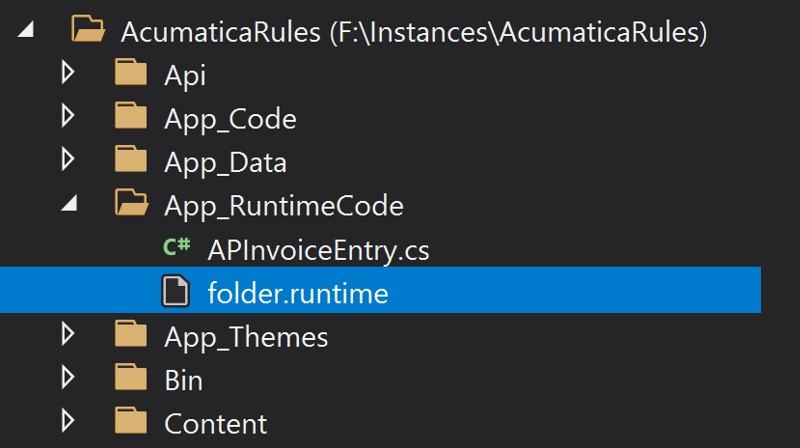
We can then add changes and save them directly from VS – and they will be automatically available without having to republish. Just refresh the browser, and you will get the new version.

You can also add new files and immediately see the effects on the system:
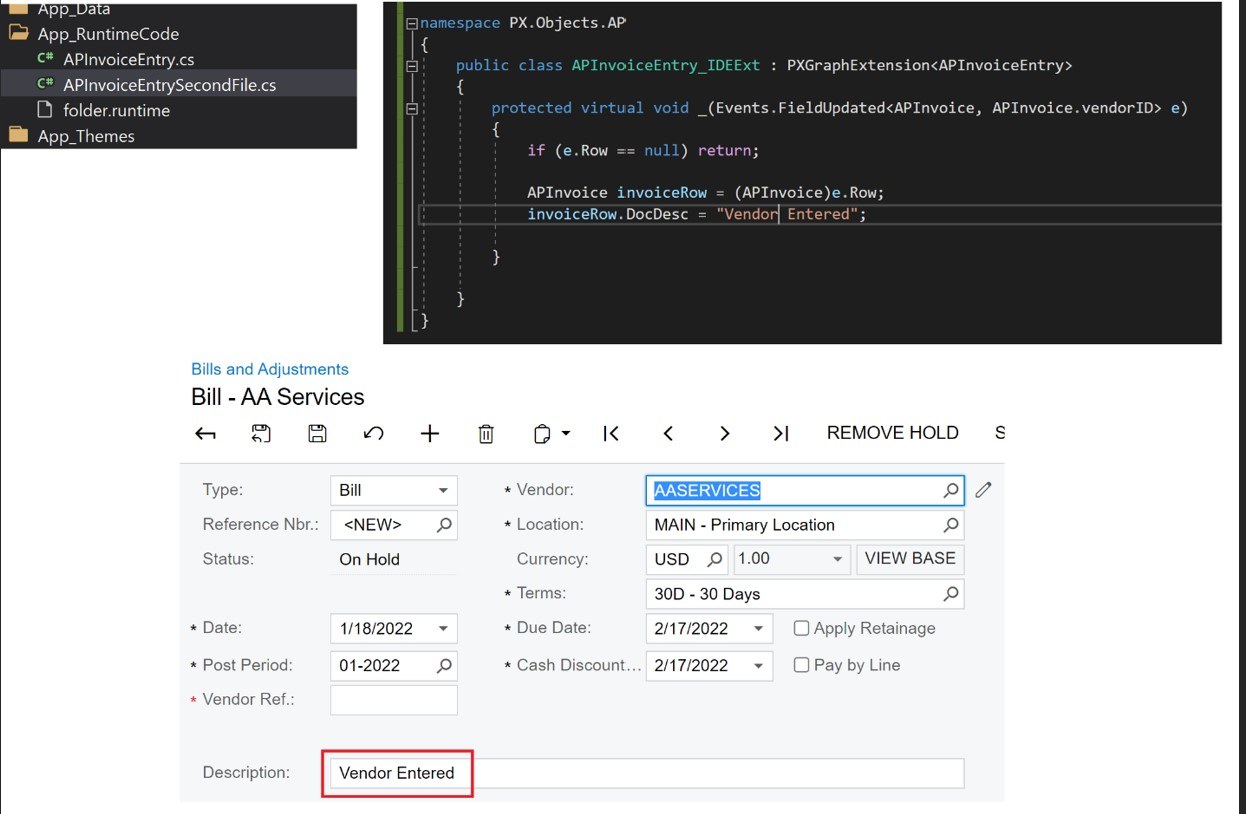
Achtung! This is great for quick development. However, if you publish without first updating the package, you run the risk of losing your changes. The customization package drives the content. And the changes implemented directly on the IDE are not the final version of the package.
So, how do we bring these changes back to the package?
Because there is no direct option to “Reload from Instance”, this is a process that will have to be done with a combination of features available in the Customization package UI and manual steps:
- If we have implemented changes in a file that was originally created from the customization package – in our example – cs – then you will have the option to reload the content if you try to publish it[2]:
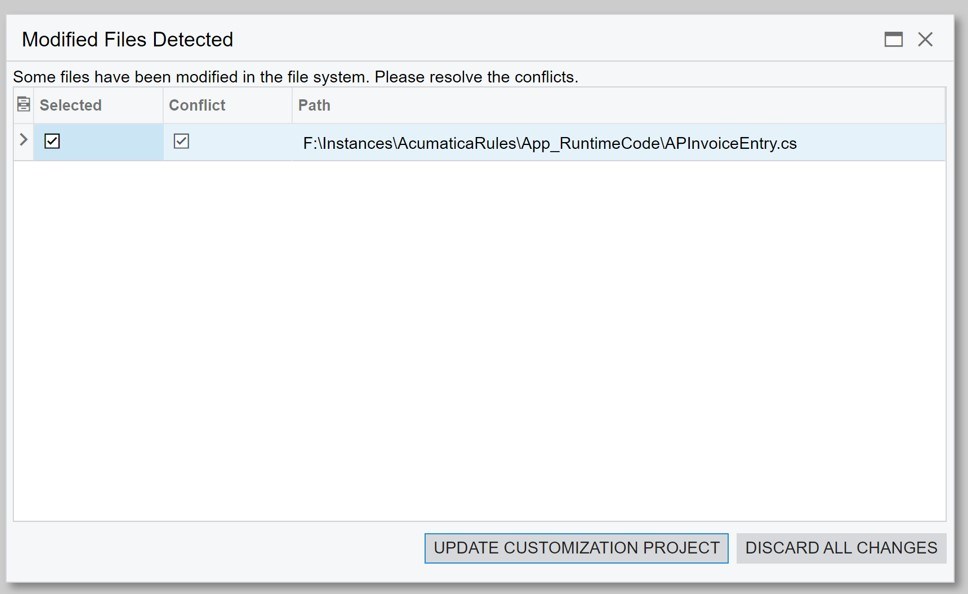
UPDATE CUSTOMIZATION PROJECT ⇒ takes the changes done in the IDE and updates the package.
DISCARD ALL CHANGES ⇒ overwrites the changes done in the IDE with the latest version available in the package.
If we select the first option, we will see the customization package content getting updated with the changes manually implemented.
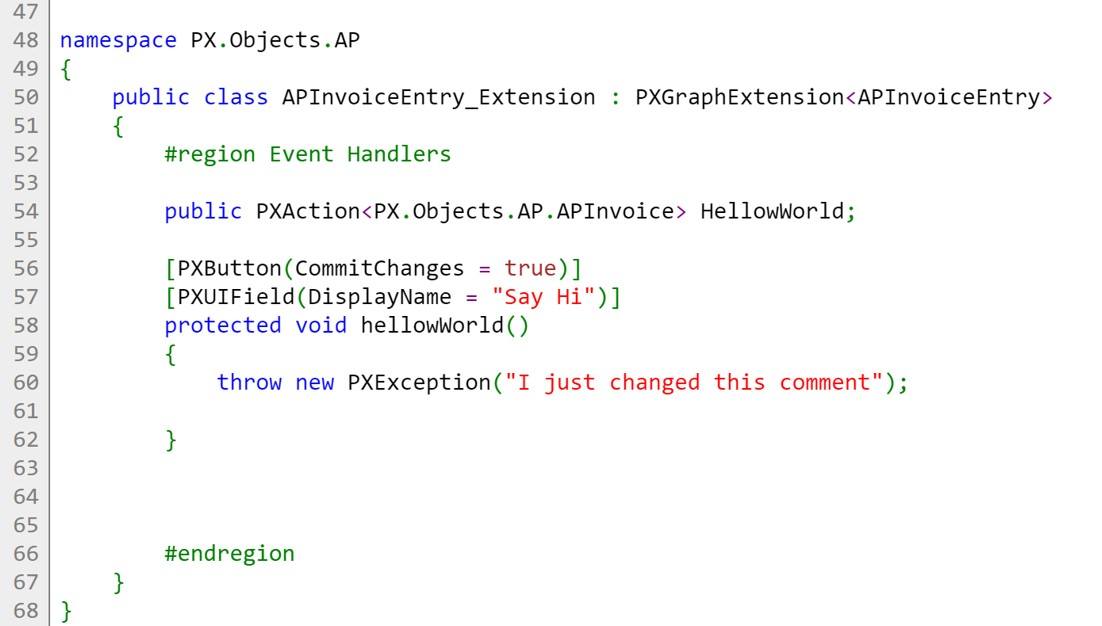
- On the other hand, if we added a new file directly in the IDE – in our example cs, then there is no direct option to “Update Customization project”. This is a process that will have to be done manually. Fortunately, it’s a direct copy/paste of our changes!
As a final note, it is important to keep in mind that because there is no compilation or publishing involved in the process, any syntax errors will not be captured until the functionality is tested.
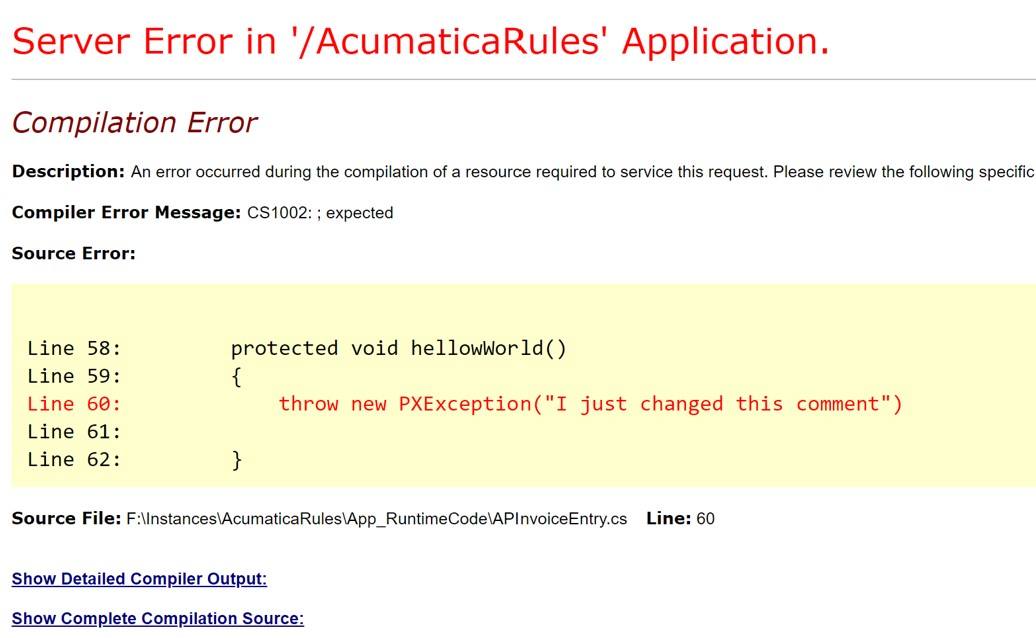
In conclusion, this is a great way to quickly test small changes without having to publish or compile which is often convenient to verify results and alternatives.
SCREENS Node
Now, let’s delve into another node that it is very often used on customizations: the Screens node.
With this feature, we are able to customize existing pages, or create new ones. Similarly, to what we did with the CODE node, let’s go ahead and see what happens under the hood when any of these changes are published.
For the sake of this post, we are going to make a drastic – not very esthetic – adjustment and locate the Description field in the third line of the header of the Bills and Adjustments page. We will do this by using the customization package’s Tree control:
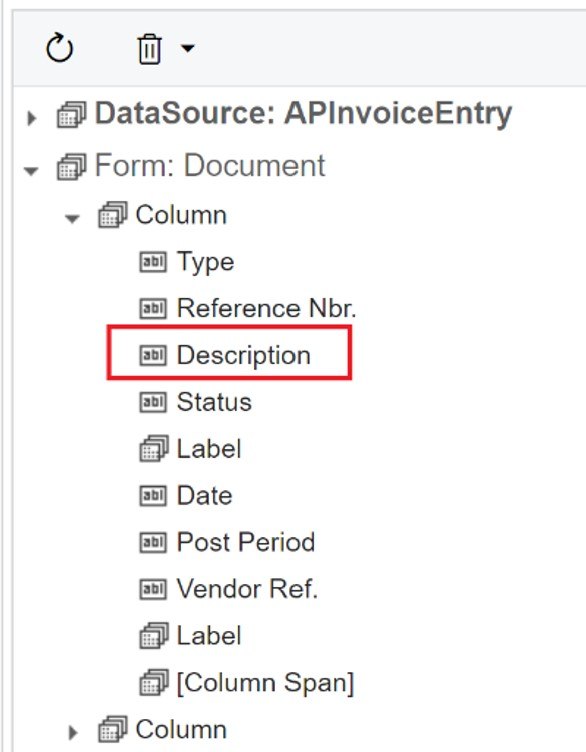
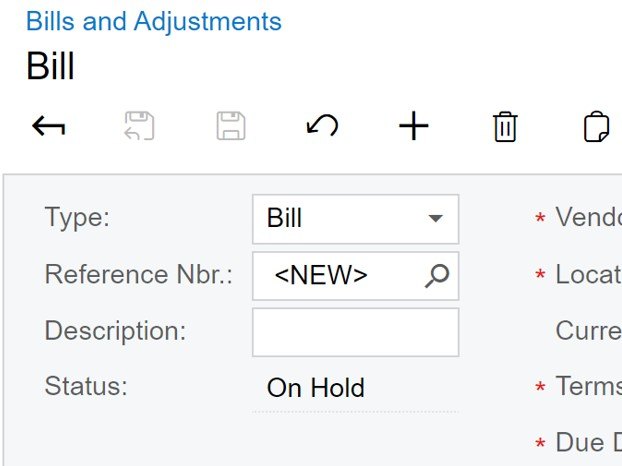
So, how does Acumatica know that the page should look this way now if the original ASPX file has not changed? The answer is in the [Instance]\CstPublished directory.
Any customization done to the out-of-the-box pages will be shown as a new set of ASPX and ASPX.CS files in that folder:

These files will not contain the specific changes only though. They will contain the merged result of the original page plus the new changes. It is a full-page re-definition.
Similarly, to how it was done for the code node, you will be able to make direct changes on these files and see the immediate effect in the UI. Let’s go ahead and swap the Status and Description fields:

We just need to save the file, refresh the browser, and the change will be available for us to see:
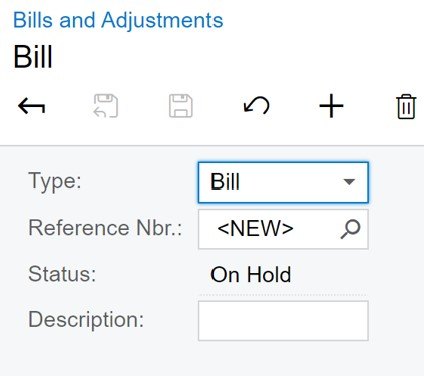
Again, as it happens for the Code node, it is the Customization Package’s actual content, the one that drives the information. If the previous version of the package is published, this swap change will get lost. So, before the package is re-published, we need to make sure to update it with the latest version of our manual changes.
In this case, we will not be offered the option to “Reload” as we did for the Code node. So, you can work with the Actions > Edit ASPX functionality to bring the changes over:
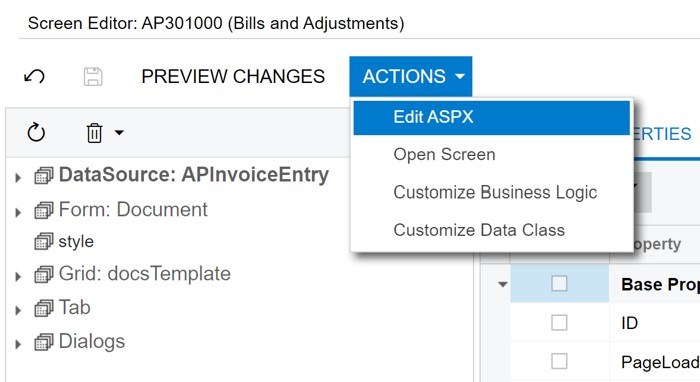
Look for the area that you are looking to change, implement the changes and press on GENERATE CUSTOMIZATION SCRIPT button:

This option of editing the APSX directly is a good alternative to the use of the tree control. It is however a bit cumbersome on occasions as it is not a plain text control. As new changes get implemented, it takes a few seconds for it to respond. I would personally recommend using it for small and specific changes, rather than a full replacement of the containers.
Quick tip: Have you ever made changes to a page in the customization package, but do not see them reflected in the UI? Just delete the content of the CstPublished folder and re-publish your package[3].
Summary
The Customization Package’s nodes that were covered in this post apply across all tenants. In other words, it is not possible to apply the customized logic or the customized page to one tenant, but not to another.
You might have seen the option of “Publish of Multiple tenants” however. This feature applies to other areas available in the customization package, which will be covered in follow-up posts of this series.
Happy Coding!
[1] there are alternative ways to do this via the Bin/ directory, but we will not be covering it on this post
[2] This feature will be available if you try to publish from within the customization package itself. Not from the Customization Projects page (SM204505)
[3] You can emulate the deletion of the files by unpublishing all packages.
 Canada (English)
 Colombia
 Caribbean and Puerto Rico
 Ecuador
 India
India
 Indonesia
 Ireland
 Malaysia
 Mexico
 Panama
 Peru
Peru
 Philippines
 Singapore
 South Africa
 Sri Lanka
 Thailand
 United Kingdom
 United States


