Reviewed: Aug, 2023
One of the most highly rated sessions delivered in our Virtual DevCon was Sergey Marenich’s Advanced Framework Tips & Tricks. He did a masterful job flushing out a number very useful activities that a developer on our platform can do to be more efficient and productive as well as some good coding practices. Since different individuals learn and benefit from a variety of modalities, we thought it would be good to share Sergey’s wisdom in written form as well. I’ll distribute the content in bite size chunks over the next several blogs posts.
But before I dive in here, I wanted to enumerate each “Tip” he presented for you to review:
- Tip 1 – Configuring Your Acumatica Instance
- Tip 2 – Configuring Your Tools
- Tip 3 – Finding More Information Through Communities
- Tip 4 – Disabling Web Site Compilation
- Tip 5 – Debugging Acumatica Code
- Tip 6 – Auto-Calc with Formulas
- Tip 7 – Minimize Duplication
- Tip 8 – Benefits of Using Events
- Tip 9 – Reuse of BQL Queries
- Tip 10 – Modifying Selectors
- Tip 11 – Fields from Different Views
As you can see from the list above, a good mix of tips that I will elaborate and flesh out for you here in serial fashion. You will discover that most of these tips are denser than they may appear simply by their titles and need unpacking to truly appreciate their utility. So, let’s jump in and discuss the first thing a developer needs to concern himself with as they begin – Configuring your Development environment, in general and your Acumatica instance, specifically.
Getting started in the development process has some prerequisites, of course. Knowledge of Visual Studio’s development environment, working knowledge of C# and the .NET Framework and some SQL are fundamental and necessary. As a reference, we provide documentation on setting up your development instance. Much of what we cover herein is things that are not necessarily documented, nor particularly obvious, buried somewhere or small things that didn’t make it into the documentation. But as we all know, often it’s the little things that make the greatest impact.
Let’s take a look some useful settings in the web.config file that you should implement.
The first thing is to make your life easier by optimizing your development environment. You need to setup your Acumatica Development instance differently than a staging and production instance environment. That’s pretty obvious, although many developers who begin start working with the Acumatica instance without configuring their environment in an optimal way. Because you are spending considerable time debugging and you require much more information surfaced as you develop your application than what users require or need.
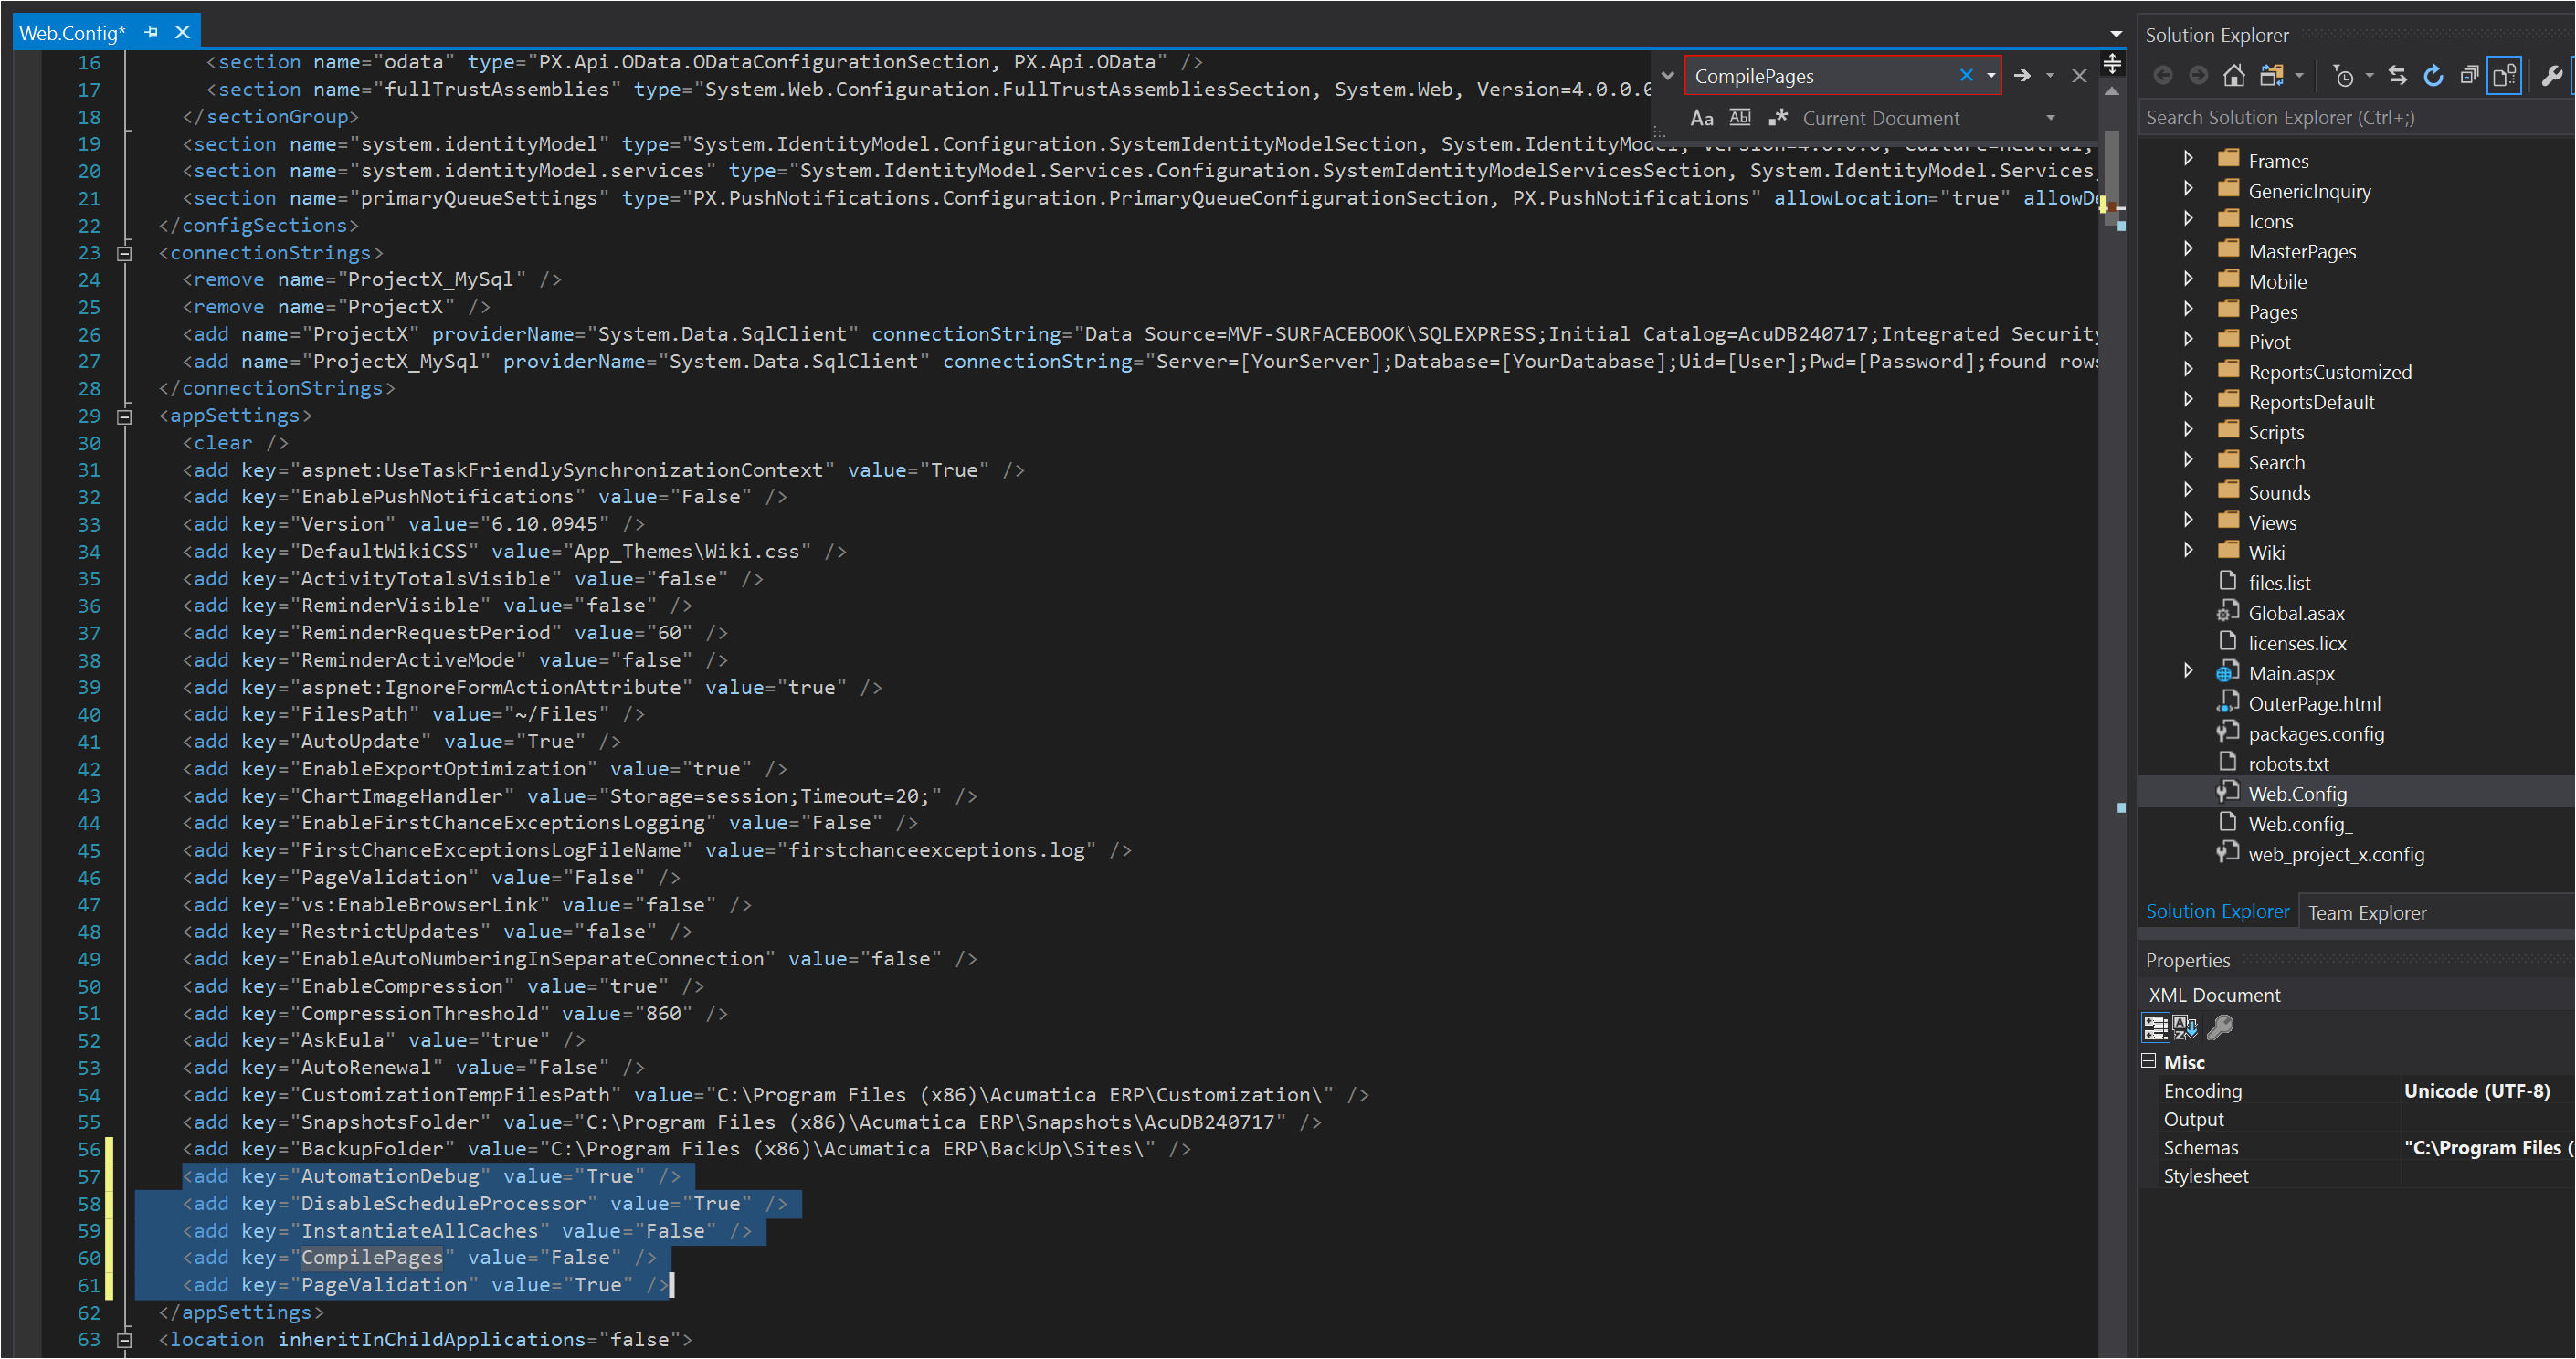
Enable website debugging in the web.config by adding the line <compilation debug=”True”…/>. You can enable and show the automation steps by adding the line <add key=”AutomationDebug” value=”True” />. To optimize for performance for the developer, you can first ignore the scheduler with the line <add key=”DisableScheduleProcessor” value=”True”/>. Further, to optimize the instance startup, add the following lines to the web.config file:
<add key=”InstantiateAllCaches” value=”False” />
<add key=”CompilePages” value=”False” />
I’ve told you that these settings are to be added to the web.config file, but I haven’t told you where. They are added to the <appSettings> section as shown below in the following screenshot.

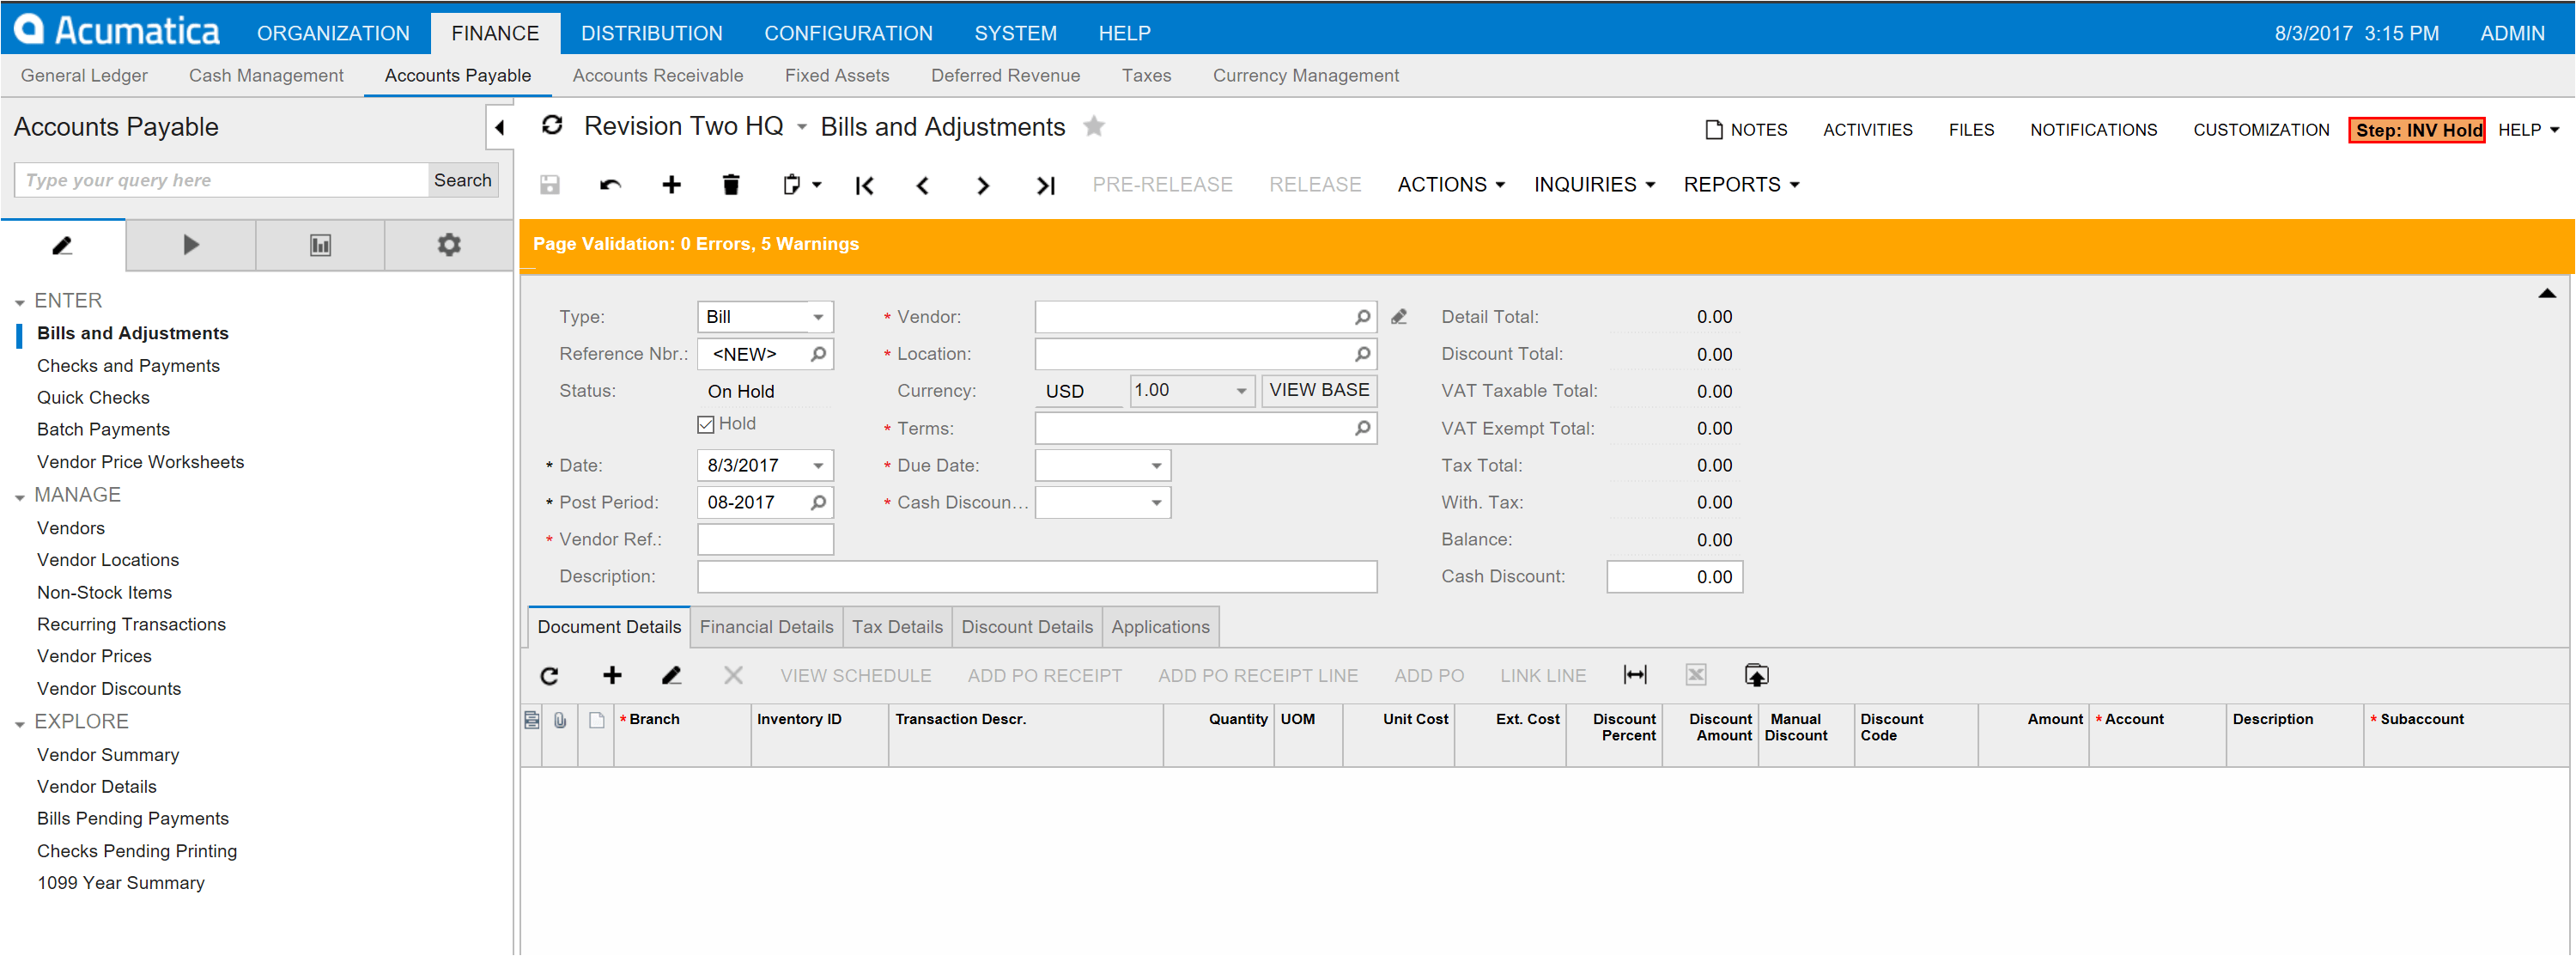
Now that we have enabled the settings, we can see one of the settings effects on the application – Automation steps. Login to your developer instance of Acumatica and go to the FINANCE tab and select Accounts Payable and Bills and Adjustments.

The first thing that stands out is the Orange bar that shows the Page Validation state. In this particular case, 0 Errors, 5 Warnings. Also, if you look in the upper corner of the application you see between CUSTOMIZATION and HELP menu items the Automaton Step you are currently on – INV Hold (Invoice Hold).
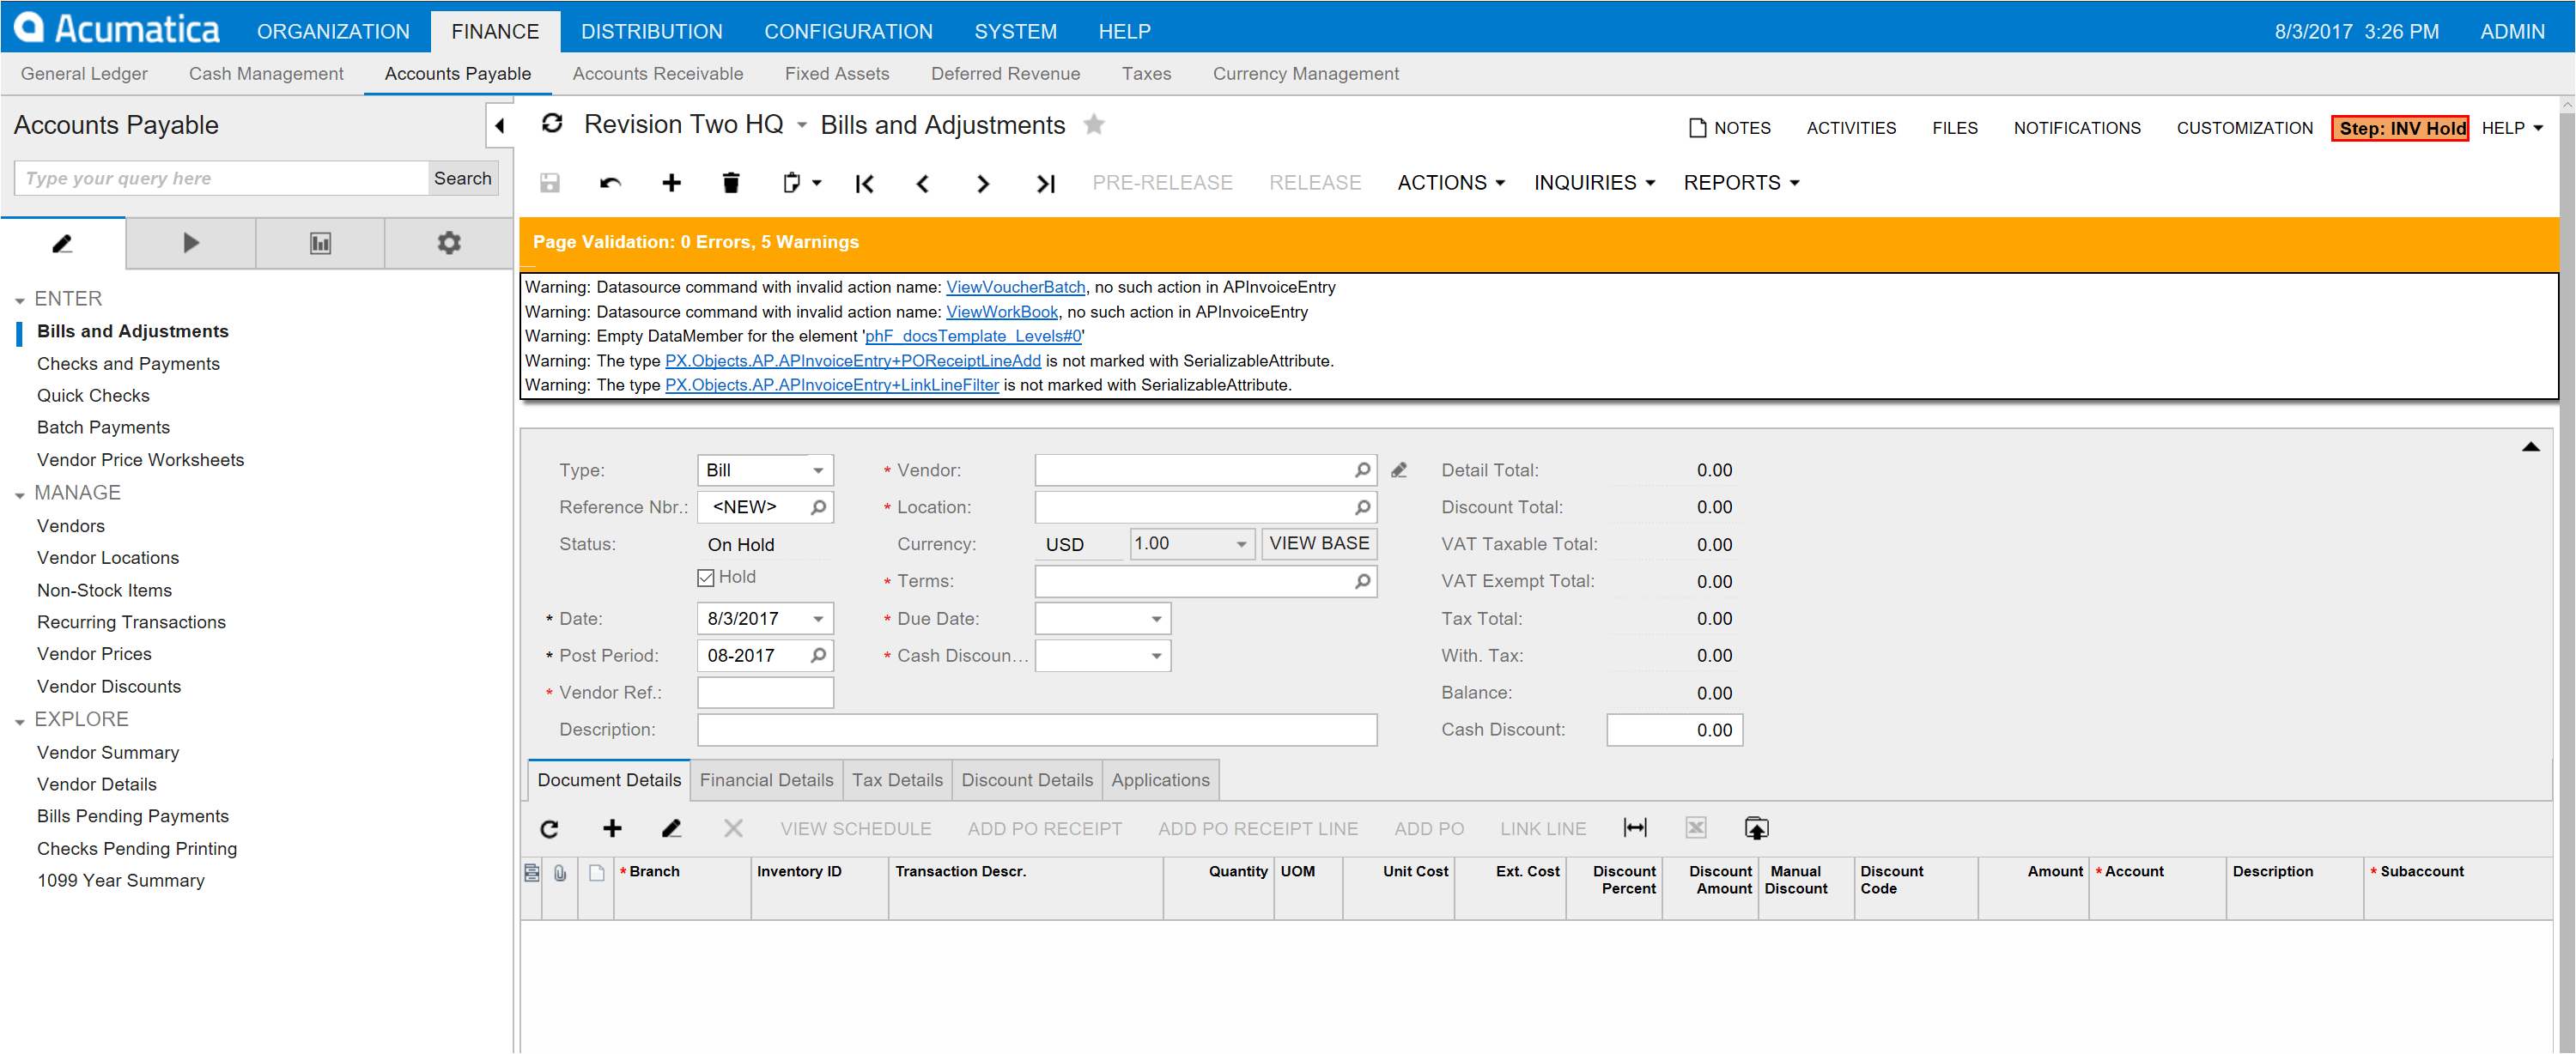
If you click on the Page Validation box, you will see the 5 warnings, where Acumatica automatically validates your application code. In this case you can see the developer has a few items to fix.

A very simple and quick thing you can do right away. You don’t even have to type. Just copy and paste the following lines into your web.config file here:
<add key="AutomationDebug" value="True" />

<add key="DisableScheduleProcessor" value="True" />

<add key="InstantiateAllCaches" value="False" />

<add key="CompilePages" value="False" />

<add key="PageValidation" value="True" />
And with that, I will end this blog post and you can get on with your day. In next week’s post, I’ll provide you more of Sergey’s tips you can apply to make your development experience with our product more productive.
 Canada (English)
 Colombia
 Caribbean and Puerto Rico
 Ecuador
 India
India
 Indonesia
 Ireland
 Malaysia
 Mexico
 Panama
 Peru
Peru
 Philippines
 Singapore
 South Africa
 Sri Lanka
 Thailand
 United Kingdom
 United States


