As it turns out, the cliché , “the more the merrier” is not always the case – nor appropriate for that matter. For instance, with respect to traffic, mortgages, IG “influencers”, and… the number of mouse clicks needed to complete an activity in a software system – more is definitely not better.
Where systems are deployed in large, busy warehouses, often the preference for users is going directly from the Acumatica screen to the printer in one click. In Acumatica, by default, this process requires at least a couple of additional clicks and a few seconds wait time while the preview window is loaded before the document is actually printed.

Starting from version 2018 R1, Acumatica included the Device Hub feature which is a process constantly running in the background polling for new documents to be printed, so that they can go from Acumatica to the printer queue in one click.
In this blog post we will review the process needed to make this happen by reviewing the installation, configuration and some good old code examples.
Printer Device Hub Installation
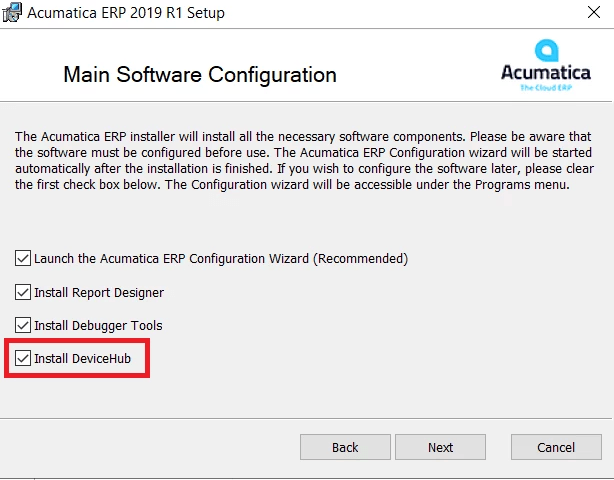
When the Acumatica ERP configuration wizard is run during the installation process, one of the configuration features available is the Install DeviceHub. Make sure this checkbox is selected and then carry on with the rest of the installation as it would normally be done.
Printer Configuration in the Server
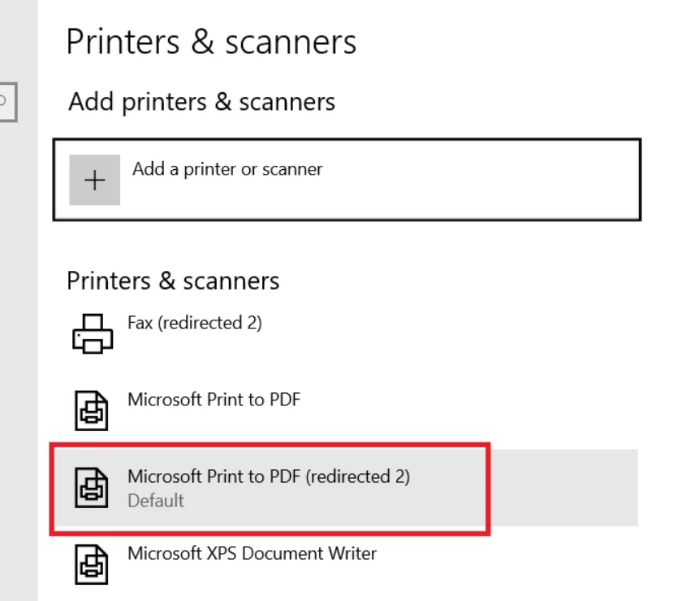
Given that all this configuration is being done in a fresh server, we need to make sure that at least one printer is correctly configured and operational. In this case, we will use the Microsoft Printer to PDF (redirected 2) printer
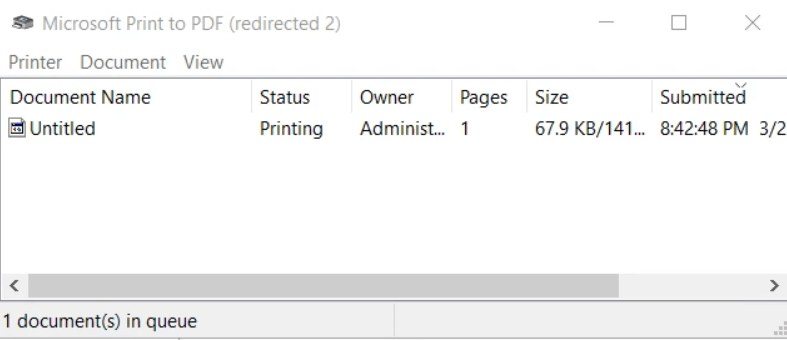
We verify that a test document is correctly added to the printer queue:
Environment Configuration
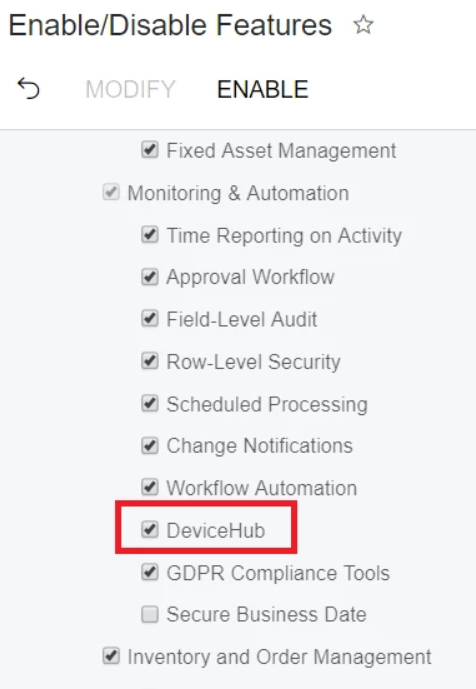
In the Enable/Disable Features page (CS100000), make sure that the DeviceHub option is selected:
The DeviceHub application itself has 2 tabs to be configured: the site and the printers.
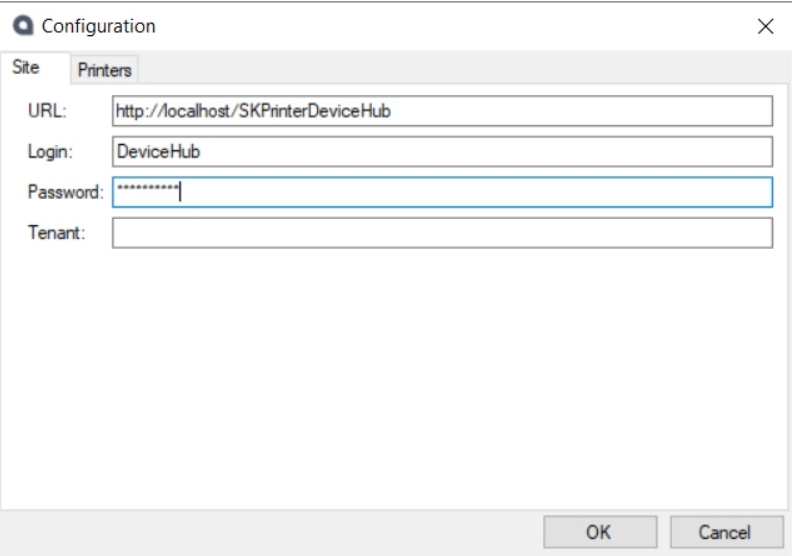
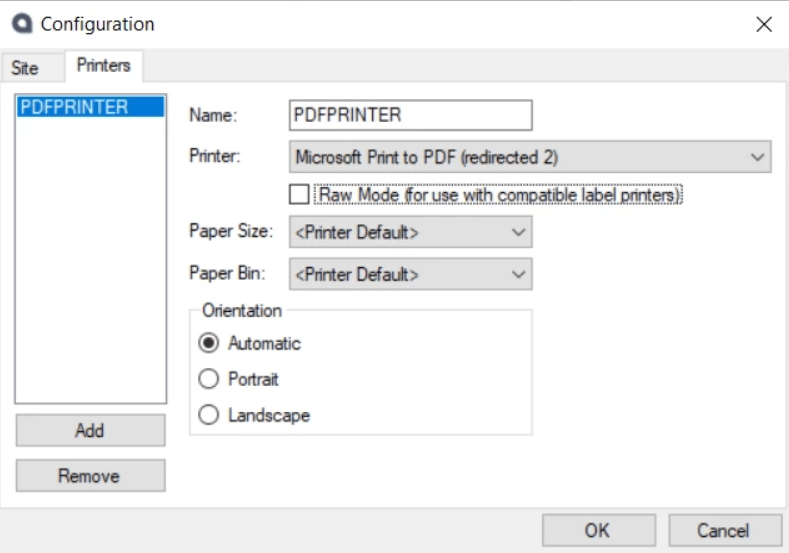
Please note that because the DeviceHub is a process that is run continuously in the background inquiring the system whether there is new information to be added to the printer queue, it is convenient to have a specific user created for this purpose.
After pressing on OK, the DeviceHub will start running and polling for new documents to be printed.
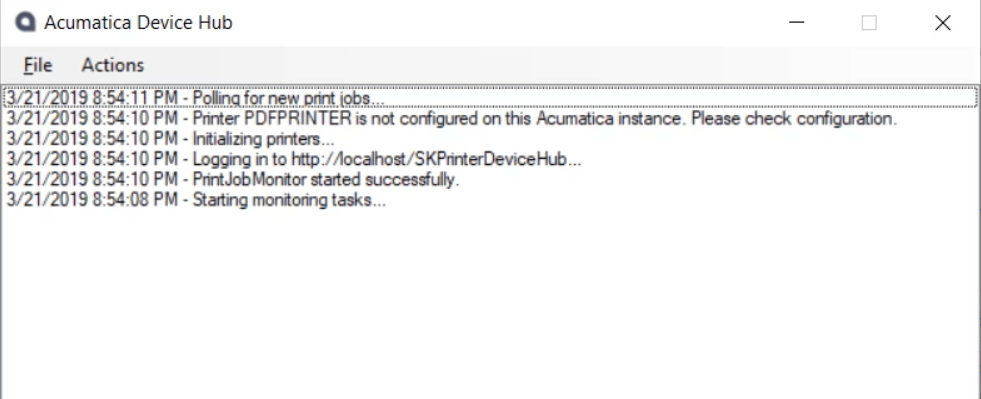
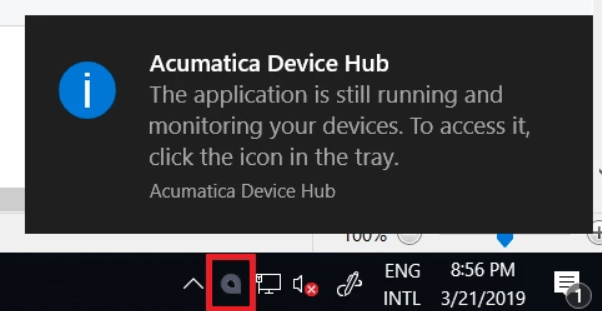
Also note that if the DeviceHub window is closed, the process will continue running in the background. To stop it, the task manager should be used.
Acumatica Configuration
The first thing that should be done is making the printer available in Acumatica. This is accomplished from the Printers page (SM206510).
In this page, the Update Printer List button is used to populate the grid with the printers previously defined in the DeviceHub.

Again, notice that that if no results are visible in the grid after pressing in the Update Printer List button, the Cancel button should be used to refresh the grid.
Completing this will update the list of available printers in the DeviceHub.

Having the printers already available in Acumatica, the next step is mapping the different users to different printers. For instance, this will allow the administrative team to use one printer, and the warehouse’s picker team utilizing another separate printer in a different location. This is done in the Printer Access page (SM106000).
This page is comprised of two tabs: the users and the associated printers.
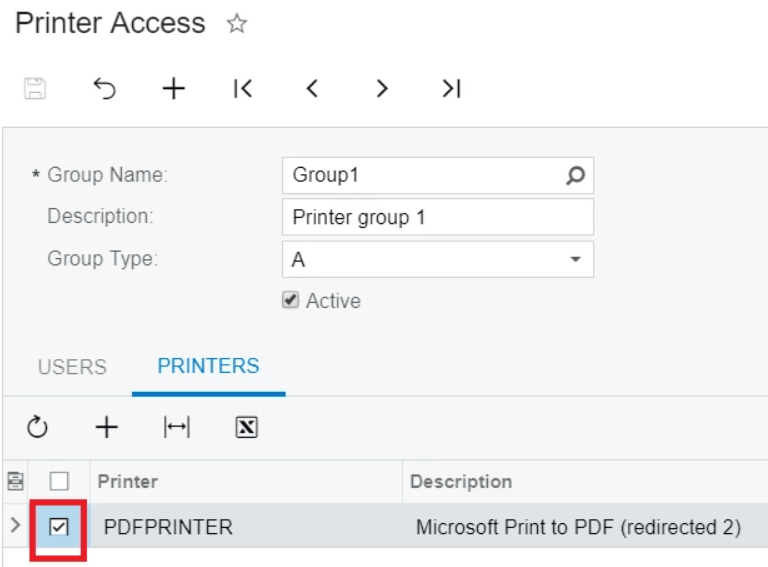
Notice that the selected users in the group do not require the inclusion of the DeviceHub user previously created as they serve different purposes: the former are used to identify the printer to be used and the latter is used for polling for jobs in the queue.
Also notice that printers and users may belong to multiple groups. The effect of this configuration is visible in the GroupMask field of the RelationGroup table where a combination of binary values allow the system to properly identify which printer to use.
With all the settings and configurations completed, next we will be extending the Inventory page and a new button to print a report will be added:
Step 1 – A graph is created to manage the printing logic:
using System;
using System.Collections.Generic;
using PX.SM;
using PX.Data;
using PX.Objects.CS;
using PX.Objects.IN;
using PX.Objects.CR;
using PX.Objects.AR;

namespace AcumaticaDeviceHub
{
    public class PEPrintSLMaint : PXGraph<PEPrintSLMaint>
    {
        #region DAC PrintParameters
        [System.SerializableAttribute]
        public partial class PrintParameters : IBqlTable, PX.SM.IPrintable
        {
            #region PrintWithDeviceHub
            public abstract class printWithDeviceHub : IBqlField
            {
            }
            [PXDBBool]
            [PXDefault(typeof(FeatureInstalled<FeaturesSet.deviceHub>))]
            [PXUIField(DisplayName = "Print with DeviceHub")]
            public virtual bool? PrintWithDeviceHub { get; set; }
            #endregion
            #region DefinePrinterManually
            public abstract class definePrinterManually : IBqlField
            {
            }
            [PXDBBool]
            [PXDefault(true)]
            [PXUIField(DisplayName = "Define Printer Manually")]
            public virtual bool? DefinePrinterManually { get; set; }
            #endregion
            #region Printer
            public abstract class printerName : PX.Data.IBqlField { }
            [PX.SM.PXPrinterSelector]
            public virtual string PrinterName { get; set; }
            #endregion
        }
        #endregion

        public static class Parameters
        {
            public const string Inventory_ID = "Inventory_ID";
        }

        public static class Fields
        {
            public static readonly string Inventory_ID = string.Format("{0}.{1}", nameof(InventoryItem), nameof(Parameters.Inventory_ID));
        }

        #region Methods
        public void PrintReportInDeviceHub(string reportID, string actualReportID, List<string> nameGroupsList, Dictionary<string, string> parametersDictionary, string printerName, int numberPrint)
        {
            Guid loggedUser = this.Accessinfo.UserID;

            Users usersRow = PXSelect<Users,
                                    Where<Users.pKID, Equal<Required<Users.pKID>>>>
                                    .Select(this, loggedUser);
            string BinaryGroupMask = Convert.ToString(usersRow.GroupMask[0], 2);

            List<string> ListGroupsUser = new List<string>();
            for (int i = 0; i < BinaryGroupMask.Length; i++)
            {
                if (BinaryGroupMask.Substring(i, 1) != "0")
                {
                    String BinaryGroup = (BinaryGroupMask.Substring(i, 1).PadLeft(i + 1, '0')).PadRight(BinaryGroupMask.Length, '0');
                    ListGroupsUser.Add(Convert.ToString(Convert.ToDecimal(Convert.ToByte(BinaryGroup, 2))));
                }

            }

            Dictionary<string, string> groupsUserDictionary = new Dictionary<string, string>();
            foreach (String GroupUser in ListGroupsUser)
            {
                foreach (RelationGroup relationGroupRow in PXSelect<RelationGroup, Where<RelationGroup.active, Equal<Required<RelationGroup.active>>>>.Select(this, 1))
                {
                    if (Convert.ToString(relationGroupRow.GroupMask[0]) == GroupUser)
                    {
                        groupsUserDictionary[relationGroupRow.GroupName] = Convert.ToString(relationGroupRow.GroupMask[0]);
                        break;
                    }
                }
            }

            foreach (SMPrinter printersRow in PXSelect<SMPrinter, Where<SMPrinter.isActive, Equal<Required<SMPrinter.isActive>>>>.Select(this, 1))
            {
                foreach (string nameGroup in nameGroupsList)
                {
                    if (groupsUserDictionary.ContainsKey(nameGroup))
                    {
                        if (groupsUserDictionary[nameGroup] == Convert.ToString(printersRow.GroupMask[0]))
                        {
                            printerName = printersRow.PrinterName;
                            break;
                        }
                    }
                }
            }

            if (String.IsNullOrEmpty(printerName))
            {
                throw new PXException(Convert.ToString("The user is not active in an impression group"));
            }

            Dictionary<string, PXReportRequiredException> reportsToPrint = new Dictionary<string, PXReportRequiredException>();
            PrintParameters filter = new PrintParameters();
            filter.PrintWithDeviceHub = true;
            filter.DefinePrinterManually = true;
            filter.PrinterName = printerName;

            for (int i = 0; i < numberPrint; i++)
            {
                reportsToPrint = PX.SM.SMPrintJobMaint.AssignPrintJobToPrinter(reportsToPrint, parametersDictionary, filter,
                new NotificationUtility(this).SearchPrinter, ARNotificationSource.Customer, reportID, actualReportID, 16);
            }

            if (reportsToPrint != null)
            {
                PX.SM.SMPrintJobMaint.CreatePrintJobGroups(reportsToPrint);
            }
        }
        #endregion
    }
}
Step 2 – Extended logic to add the print button
using System.Collections;
using System.Collections.Generic;
using PX.Data;
using PX.Objects.IN;

namespace AcumaticaDeviceHub
{
    public class InventoryItemMaintSKExt : PXGraphExtension<InventoryItemMaint>
    {
        public PXAction<InventoryItem> printLabel;
        [PXUIField(DisplayName = "Print Item Balance", MapEnableRights = PXCacheRights.Select, MapViewRights = PXCacheRights.Select)]
        [PXButton(CommitChanges = true)]
        public virtual IEnumerable PrintLabel(PXAdapter adapter)
        {
            PEPrintSLMaint tGPrintGraph = PXGraph.CreateInstance<PEPrintSLMaint>();

            Dictionary<string, string> parametersDictionary = new Dictionary<string, string>();
            parametersDictionary[PEPrintSLMaint.Fields.Inventory_ID] = this.Base.Item.Current.InventoryCD.Trim();
            List<string> ListGroupsFilter = new List<string> { "Group1", "Group2", "Group3" };
            tGPrintGraph.PrintReportInDeviceHub("IN615000", "IN615000", ListGroupsFilter, parametersDictionary, null, 1);

            return adapter.Get();
        }
    }
}
Example Result
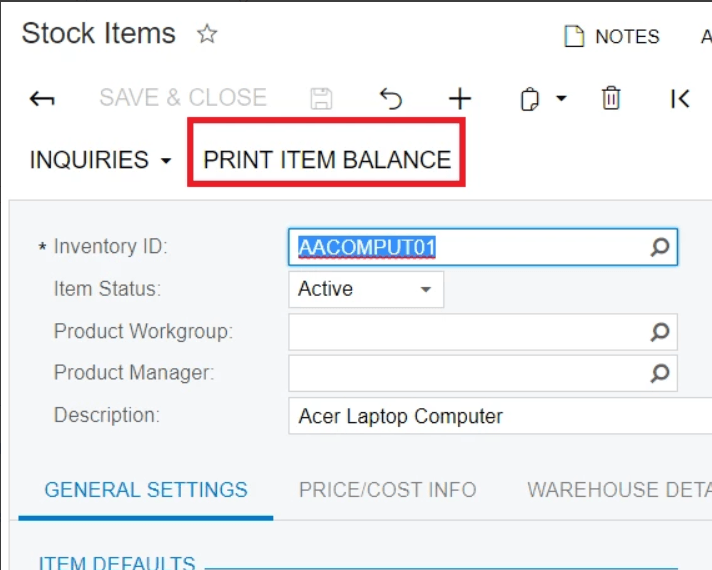
When the user presses on the new Print item balance button, the report is added directly in the printer queue:
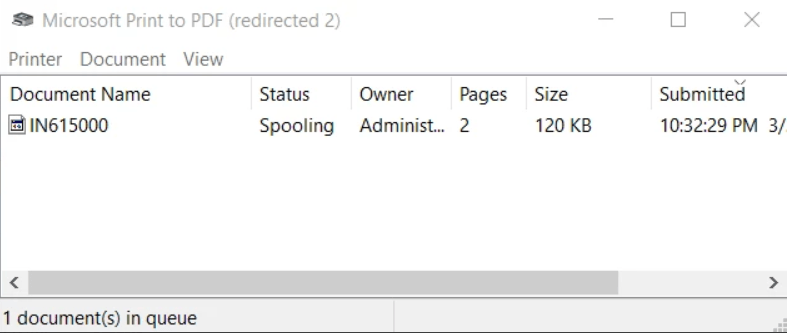
And the DeviceHub indicates the job being printed:

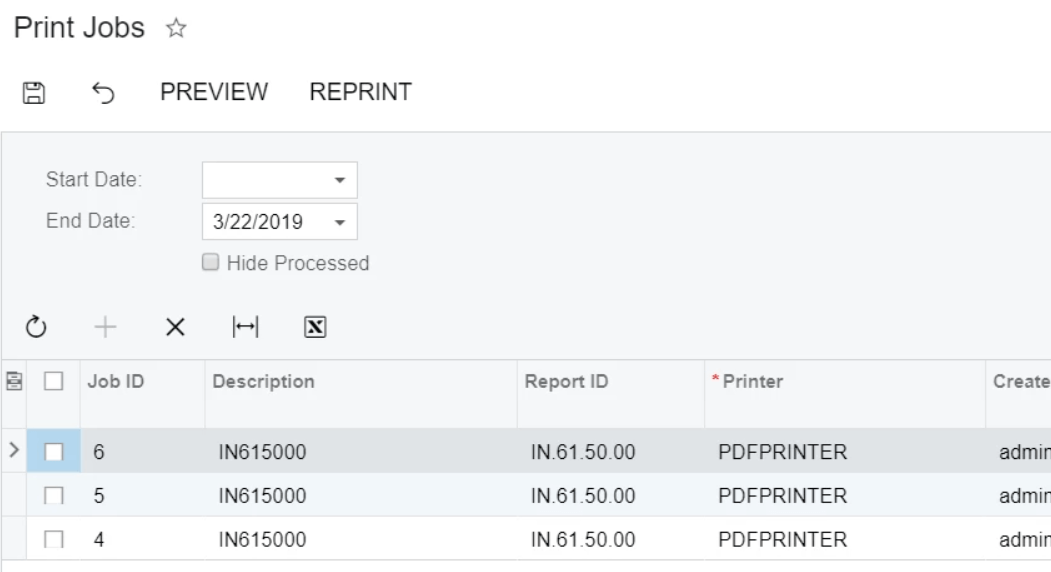
The list of pending and processed print requests can be found in the Print Jobs page:
Conclusion
Take advantage of Device Hub feature in Acumatica R1 and later versions. Printing a few documents a day with this feature does not have a significant effect in many cases. However, for bustling warehouses where new pallets, boxes, and packages are continuously being assembled, a few seconds saved, per print request, add up at the end of the day. This translates directly to increased efficiency and performance. Because you know what they say, “time is money”.
*Click on the link to download the C# sample code in the article.


